The Mexichelada Mary


I am not a very good planner. If I can arrange my day a couple hours in advance, I'm ahead of the game. I procrastinate on making dentist and doctor appointments, I usually reply to invitations on the last day before the RSVP, I fill out all those kid forms the morning they are due, and thank God for online bill paying. It has saved my A$$ a number of times. I do though, typically figure out what to make for dinner a week in advance. We all have our priorities.

Well today, I did not plan to make dinner. We headed to a new Mexican restaurant in town. Many New Jersey restaurants do not have liquor licenses (some crazy New Jersey law), so I concocted my own south of the border libation to enjoy. The Mexichelada Mary is a beer based drink with tomato juice, hot sauce, Worcestershire, and a shake of pepper. The drink is served in a salt rimmed glass (most of my favorite drinks are served in salt rimmed glasses) with a wedge of lime. The base of my drink was made with my Beer-of-the-Summer, Bud Light Lime. I am protesting slightly since the sale of Anheuser Busch to a foreign company, though.

Delightfully delicious.

The Mexichelada Mary

makes 1 big drink

1 (6-ounce) can of tomato juice
2 teaspoons Worcestershire sauce
2 teaspoons hot sauce
1 (12-ounce) bottle Bud Light Lime
salt to rim glass
lime slice
shake of pepper

In a 2-cup measuring cup, combine tomato juice, Worcestershire sauce, and hot sauce. Slowly pour in beer. Rub lime wedge along rim of a tall glass and dip in salt. Pour drink into glass, add a shake of pepper, and serve with lime wedge.


Garlic Lemon Shrimp and Orzo


Like many food bloggers, I spend an inordinate amount of time reading, developing, and testing recipes. I love to grocery shop. The fiction that I read is somehow about food. I watch culinary television shows. My cookbooks and magazines overflow my shelves.

I have found a way to share my passion for all things food, make a little cash while I'm at it, and not work crazy restaurant hours. As a personal chef, I help hungry families gather around the dinner table with a meal that doesn't come in a flat, cardboard box.

My business allows me get to know a family well. I plan and shop for their groceries. I cook in their home anywhere from 3 - 6 hours. I know what foods they like and what they don't like. Kids are running through the kitchen. Dogs are looking for a handout. As the name implies, it is a personal job. I would have to say this is a dream job for me. I love cooking for my family and now I get to share my passion for good food with others.

Today I cooked for a client that I have had for over a year. This family is an ideal client in that they are up for trying new recipes and foods. Also, for the most part, they let me pick their menus. One of their selections for a dinner this week was Garlic Lemon Shrimp and Orzo.

A white wine sauce enhanced with onions and garlic is used to poach the shrimp. Parsley and Parmesan and a pat of butter enrich the sauce before it is tossed with orzo. A filling yet light meal that will be enjoyed by your family and friends alike.

Garlic Lemon Shrimp and Orzo

serves 6

1 1/2 cups orzo, cooked according to package directions and drained, set aside
2 tablespoons olive oil
1 1/2 cups onions, diced
4 garlic cloves, minced
1 lemon, juiced and zested
3/4 cup white wine
salt, to taste
pepper, to taste
1 tablespoon butter
2 pounds of shrimp, 21 - 25 count, peeled and deveined
1/3 cup parsley, chopped
2/3 cup Parmesan cheese, grated

In a large saute pan, heat olive oil. Add onions and cook for about 5 - 6 minutes or until they are soft but not brown. Add the garlic and cook for an additional minute.

Add the lemon juice, zest, and wine. Bring to a boil then reduce the heat and cook for 2 - 3 minutes to meld the flavors together. Taste and season with salt and pepper. Stir in pat of butter until melted.

Add the shrimp and cook until just cooked through, about 3 - 4 minutes. Toss shrimp and sauce with the orzo, parsley and Parmesan. Serve with extra cheese.


New Jersey Steak Sandwich


When I was a recent college graduate (only about 20 years ago), my first "real" job was as a commercial real estate appraiser in downtown Chicago. I was single, commuting into the city on the train, wearing sneakers with my stodgy business suits, and carrying a briefcase with not much more than a folder, pen and a few business cards in it. My daily lunch group consisted of similar college grads in similar business attire who's main noontime topic consisted of where we were going to happy hour after work. One of our frequent lunch destinations was to a Chicago dining institution - Al's Italian Beef. The only item I would order was a hoagie roll dipped in au jus and loaded with italian beef and peppers. With a side of fries and a Coke, I could feel my cholesterol rising at the young age of 22.

Being at a different point in my life (18 years of marriage, 3 kids, and far from the world of real estate appraisal) and living in another city (actually a small, northern New Jersey town), I get the occasional craving for an italian beef sandwich. I came up with the New Jersey Steak Sandwich to remind me of lunching with my co-workers while working in the Big City.

I streamlined the process of making the sandwiches by grilling up two marinated london broils earlier in the week. One was for dinner that night, and the other was wrapped in foil, placed in a resealable bag, and stored in the refrigerator until later in the week. That way when dinner time rolled around on Friday, all I had to do was saute some onions, make a simple cheddar cheese sauce, and assemble the sandwiches.

I served the sandwiches with slices of watermelon and kettle chips. No Thank You boy opted out of the cheese sauce (crazy kid), and My Oldest and My Middle One decided to top from plain pasta from the refrigerator with the cheese sauce to make their own mac and cheese to go along with the steak. I still have enough left for a few more sandwiches for lunch the next couple days. The Husband is going to be a happy man.

New Jersey Steak Sandwich

for the marinated steak -
1 london broil - about 1 1/2 to 2 pounds
4 garlic cloves, mashed
2 teaspoons salt
1 teaspoon pepper
2 teaspoons dried oregano
1 teaspoon dried thyme
1 teaspoon onion powder
2 tablespoons hot sauce
3/4 cup olive oil
1/4 cup red wine vinegar

In a small bowl, combine all ingredients for the marinade. Place the london broil in a resealable bag and add the marinade. Marinate for about 4 hours. Prepare a barbecue and grill the london broil over a hot fire for about 8 minutes per side for more on the rare side. Remove from grill, let cool and then wrap in foil, place in a resealable bag and stash it in the refrigerator.

for the sandwiches --
4 tablespoons butter
1 large Vadalia onion, sliced thin
2 tablespoons Worcestershire sauce
1 teaspoon pepper
1 cup beef stock


Heat a large saute pan to medium high and add butter. When it begins to foam, add the sliced onions and saute for 15 - 20 minutes or until softened and browned. Add Worcestershire sauce, pepper, and beef broth and bring to a boil. Cook for 2 - 3 minutes then reduce the heat to low to just keep mixture warm.

for the cheese sauce --
2 cups milk
3 tablespoons cornstarch
2 cups grated sharp cheddar cheese
1 teaspoon ground mustard
1/2 teaspoon salt

In a small saucepan, stir the milk and cornstarch until the cornstarch dissolves. Heat the mixture over medium high heat until it begins a gentle boil, stirring occasionally. Cook for about 3 - 4 minutes or until mixture thickens and coats a spoon. Stir in the cheese, mustard and salt until the cheese melts and the sauce is combined. Set aside.

To assemble the sandwiches --
1 cooked london broil
1 batch of sauteed and seasoned onions
1 batch cheddar cheese sauce
6 long rolls

Remove the london broil from the refrigerator and slice into bite sized pieces.

Add the meat to the onion mixture and just heat through. Slice the rolls and top with a generous portion of the meat and onions and a large dollop of the cheese sauce. Replace the top of the roll and smash down a little. Serve with plenty of napkins.

Fudgy Tofrozen Chipwich

Fudgy Tofrozon Chipwich
As I purchased 2 more half gallons of ice cream, I decided it was time to curb my family's consumption or make a more nutritious frozen treat. No Thank You Boy has an affinity for Tofutti Cuties so I thought making a frozen tofu ice cream sandwich may be an option. Thus, Fudgy Tofrozen Chipwiches were born.

It starts with a jiggly block of tofu


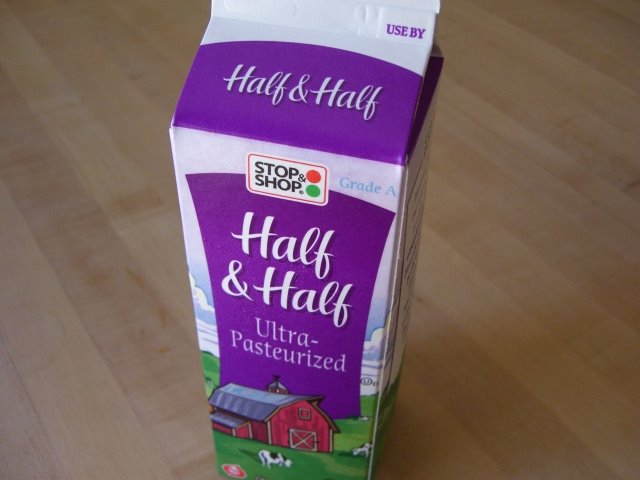
to which sugar, salt, half and half


and vanilla extract are added and whipped up in a food processor.


The tofu mixture is put into a large bowl and a huge container of frozen whipped topping is folded in.


25 Oreos are crushed and folded in.


Freeze in containers for a few hours then enjoy.

Save some of the tofrozen to make Fudgy Tofrozen Chipwiches. I made a batch of Fudgy White Chocolate Chip Cookies and sandwiched a heaping tablespoon between 2 cookies.

My new creation is probably not anymore nutritious than ice cream but, it is tasty.

Oreo Tofrozen

makes about 2 quarts

1 (14-ounce) package reduced fat, firm tofu, drained
1/2 cup sugar
1/2 cup half and half
1 teaspoon vanilla extract
1/4 teaspoon salt
1 (16 ounce) container frozen, fat-free whipped topping
25 Oreos, crushed

Combine the first 5 ingredients in a food processor and process until smooth. Place tofu mixture in a large bowl and fold in the whipped topping and crushed Oreos. Put mixture into containers and freezer until firm - about 2 to 3 hours.

To make Fudgy Tofrozen Chipwiches, put a heaping tablespoon of tofrozen between 2 cookies and press gently together. Wrap in plastic wrap and freeze.

Fudgy White Chocolate Chip Cookies


makes about 40 cookies

2 1/4 cups flour
1 teaspoon baking soda
1 teaspoon salt
3/4 cup butter (1 1/2 sticks), softened
3/4 cup brown sugar, packed
1/4 cup sugar
1 (3.4 ounces) package instant chocolate fudge pudding
2 extra large eggs
1 teaspoon vanilla extract
2 cups white chocolate chips

Preheat oven to 350 degrees. Using a standing mixer or a large bowl with a hand mixer, cream butter and sugars. Beat in pudding mix until well blended. Beat in the eggs and vanilla. Slowly add the flour, baking soda and salt. Stir in white chocolate chips.

Line 2 baking sheets with parchment paper. Drop cookie dough by rounded tablespoons about 2 inches apart onto baking sheets. Bake for about 9 - 11 minutes. Remove from sheets and cool.

Grilled Turkey

Grilled Turkey
The Thanksgiving menu varies little from family to family. Turkey. Gravy. Mashed Potatoes. Sweet Potatoes. Green Beans. Cranberry Sauce. Rolls. Wine. A few regional favorites are thrown into the mix, and it always is a good meal. As an added bonus, a nap is typically enjoyed afterward.

Every year at the Thanksgiving table, the inevitable question is, "Why do we only eat this once a year? It is such a good meal" No Thank You Boy asks, "Is turkey really expensive?"

As I was off doing the weekly grocery shopping, I eyed the fresh turkeys. "Are they too expensive?" I said to myself. "Can we have turkey more than once a year?" Then I thought it's 90 degrees outside, I'm not turning on the oven for over 2 hours. Newsflash. Put the bird on the grill. The turkey will have a nice smokey flavor and clean up will be minimal. After talking to myself next to the raw turkeys at the grocery store, I picked out a about a 10 pound gobbler and headed home.

As with most nights, a couple family members were absent. The Husband was eating his weight in paella at a business meeting. My Middle One was recuperating from the 24 hour birthday party she attended earlier in the day. My Oldest, No Thank You Boy, and I enjoyed Grilled Turkey, Gravy, Steamed Green Beans, and Roasted Sweet Potatoes. Ok. I did turn on the oven for the sweet potatoes, but only for 45 minutes. Not the most earth-shattering menu.

A tasty dinner
Sometimes the simplest meals are the most satisfying. There was no nap afterward, but we were happy to have turkey in July. And those who missed dinner can have the leftovers the next day for lunch.

Grilled Turkey

10 - 12 pound whole turkey
melted butter
salt
pepper

Heat grill using indirect method. Either a gas or charcoal grill can be used, but I prefer charcoal. Here is some information on grilling if you are unfamiliar with the method.

Remove the giblets from inside the turkey. I have been known to forget this step more than once. Brush the turkey with melted butter and sprinkle generously with salt and pepper. If using a charcoal grill, place a foil drip pan between the charcoal piles to catch the drippings. Use the drippings for making gravy. Replace the grate and put the turkey in the center. Cover and grill.

About 40 - 50 minutes into the grilling time, add a few briquettes to the piles of burning embers. This will help keep the temperature even inside the grill.

A 10 - 12 pound turkey will take about 2 to 2 1/2 hours to grill. The internal temperature of the thigh will be 180 degrees and the breast meat will be 170 degrees. Remove the turkey to a cutting board and let rest uncovered for 15 - 20 minutes before carving. My friends at Butterball will help to carve a turkey if you need assistance. They even have a video.


Turkey Gravy

1/4 cup turkey drippings from drip pan
1/3 cup flour
1 1/2 cups water
1 1/2 cups milk
1/2 teaspoon dried sage
salt
pepper

In a small saucepan, heat the turkey drippings. Whisk in the flour and cook for about 1 minute. Whisk in the water and milk. Cook for a few minutes, whisking occasionally, until thickened. Add sage. Season with salt and pepper. Keep gravy warm over low heat until ready to serve.

Having 3 kids usually means there is a fight over which 2 get to make a wish with the wishbone. With only My Oldest and No Thank You Boy at dinner, my wish came true and no one argued on this night.

Feeling lucky?

Black Bean and Barbecued Pork Soup

Black Bean and Barbecued Pork Soup
Even though temperatures are reaching the upper 80s, I had 2 requests for black bean soup. I have made it a couple times and was never really satisfied with the results. Low and behold I was perusing my stepmom's recipe book and found an interesting recipe. Black Bean and Barbecued Pork Soup is a chunky version of the soup with the addition of barbecued pork. How convenient. I have about 5 pounds of pulled pork in my freezer.

As with most soups, Black Bean and Barbecued Pork Soup is quick to prepare. I had most ingredients on hand. If you don't have a ziploc of pulled pork in your freezer, substitute about a pound of cooked ground pork mixed with 1/2 cup of your favorite barbecue sauce.

Before I made the soup, I knew only 3 of the 5 family members would be partaking in the dinner time meal. My Middle One was off to a 24 hour birthday party at a friend's house and, No Thank You Boy was recovering from hernia surgery. His diet has consisted of Jell-O, pudding, ice cream, and more pudding. My Oldest is a huge bean-eater. Nutritious but disastrous on the digestive system. She loved loved the soup, but said, "I could do without the spiciness." The Husband commented that he was glad I made such a big pot of soup. I liked the thick and chunkiness of the soup consisting of beans, corn, onions, and pork.

It is truly a whole meal in one bowl. Make a pot and you won't be disappointed.

Black Bean and Barbecued Pork Soup

Black Bean and Barbecued Pork Soup
makes about 8 servings

Note - if you don't have homemade pulled pork, many grocery stores sell prepmade pulled pork in their meat and seafood department.  Or you can substitute 1 pound of ground pork browned and drained and mixed with 1/2 cup of your favorite barbecue sauce.

3 tablespoons olive oil
1 1/2 cups onion, chopped
3 garlic cloves, chopped
5 cups chicken broth
4 15-ounce cans black beans
2 10-ounce cans diced tomatoes and green chilies
2 teaspoons cumin
1 lb. pulled pork
salt to taste
3 tablespoons lime juice
2 cups corn
sour cream
3 scallions, sliced thin
1 cup tomato, diced

Heat olive oil in a large stock pot and add onion. Saute for 8 - 10 minutes. Add garlic and saute an additional minute. Stir in the broth, 3 cans of the black beans, the tomatoes and chilies, cumin, and pork. Bring to a boil then reduce the heat and simmer for 15 minutes.

Meanwhile, process the remaining can of beans in a food processor or blender. After simmering the soup for 15 minutes, stir mashed beans into pot along with the lime juice. Heat for about 3 - 4 minutes or until heated through. Season to taste with salt.

Serve soup topped with corn, sour cream, scallions and tomatoes.

Food Tip of the Day #3

Put it on a stick.

Make dinner time, happy hour, or even an afternoon snack a veritable riot by putting food on a skewer. The most obvious skewer is a beef, chicken, pork or some sort of fish/shellfish kebab. Try Grilled Teriyaki Sea Scallops, Lemon Barbecued Chicken and Shrimp Kebabs or the Asian inspired Pork Tenderloin Kushiyaki. For a nibble with drinks, sandwich small chunks of fresh mozzarella between cherry tomatoes that has been cut in half. Skewer on toothpicks and drizzle with balsamic vinaigrette and some finely chopped basil for a caprese salad on a stick. Have a snack for the kids with skewers of fresh fruit and cheese and let the party begin.

Roasted Orange and Thyme Chicken Thighs with Crispy Parmesan Potatoes


As a personal chef, I am constantly testing recipes for my clients. One of the challenges I face when I cook for different families is that each has varying tastes. Some like classics such as lasagna and meatloaf, others are adventurous and like me to make new entrees for them each time I cook, and others like a combination of both. Researching recipes used by fellow personal chefs resulted in Roasted Orange-Thyme Chicken Thighs.

The recipe was originally developed by Bobby Flay of the Food Network and owner of numerous restaurants. I changed two important details from Mr. Flay's recipe; I substituted orange juice instead of tangerine juice, and roasted the chicken rather than grilling it. I was out of charcoal and wasn't running out to the store to pick it up. I am sure that grilling would add a smokey taste to the chicken, but we still enjoyed the roasted version.

No Thank You Boy was first with reviews. "This is really good. Make something else like this for tomorrow night."

"How about just eating the leftovers," I said.

"I am starving," whined My Oldest. "I need some more." I'll take that as a positive review.

In addition to the chicken, I served Crispy Parmesan Potatoes and steamed green beans. A good enough menu to deserve a repeat preformace at our house.

Roasted Orange and Thyme Chicken Thighs


10 boneless, skinless chicken thighs
olive oil
salt
pepper
3 tablespoons olive oil
1 small red onion, diced
3 cups of orange juice
2 teaspoons thyme, dried
scant 1/4 cup pure maple syrup
2 tablespoons soy sauce
1/2 teaspoon pepper
1/2 teaspoon salt

Preheat oven to 375 degrees. Place chicken thighs on a baking sheet and drizzle with olive oil and season with salt and pepper. Set aside.

Heat 3 tablespoons of olive oil in a small saucepan and saute onions for about 8 minutes. After onions have sauteed, place chicken in preheated oven and roast for 20 minutes. Meanwhile, add orange juice and thyme to sauteed onions and bring to a boil. Cook for about 20 minutes or until reduced to about 1/2 cup stirring occasionally. When orange juice mixture has reduced to 1/2 cup, add maple syrup, soy sauce, pepper and salt. Continue to boil for about 2 - 3 minutes. Remove from heat.

Remove chicken from oven and brush with a generous amount of the sauce. Return to oven and continue roasting for about 10 - 15 more minutes or until chicken is cooked through. Remove chicken from oven and serve with remaining sauce.


Crispy Parmesan Potatoes


5 medium potatoes, cut in chunks
about 3 - 4 tablespoons olive oil
3/4 cup seasoned bread crumbs
1/2 cup Parmesan cheese

Mix all ingredients together in a large bowl. Spread on a greased baking sheet. Bake in a preheated 400 degree oven for about 30 to 40 minutes. Turn occasionally so they don't burn. The potatoes should be tender and lightly browned.


Zucchini Pie


The sad reality has set in. It is back to the real world as our family vacation comes to an end today. Cue the violins. Countless loads of laundry to wash, floors to scrub, bills to pay.... These are a few of my favorite things.

The Husband noticed my funky mood; he wisely agreed with my suggestion to pick up some essentials for dinner on the trip home from the beach. A gallon of milk. 2 pounds of salmon. 4 zucchini. 2 pie crusts. Half gallon of vanilla bean ice cream. 5 ears of corn. Loaf of bread. Dinner included grilled salmon, corn on the cob, Zucchini Pie, and crusty bread with seasoned olive oil for dipping.

I have made this Zucchini Pie countless times. I even made a note on the recipe to make 2 because it is devoured by zucchini-lovers and haters alike.


Making pie dough was beyond my capabilities on this night. I used a trusty Pillsbury pie dough which never disappoints. The dough is brushed with Dijon mustard before adding the filling which adds a zippy taste.


Some slicing, chopping, mixing, and baking and the pie was ready in about 45 minutes.

"I don't know why this is so good, but it is" said The Husband. "One of my favorites," chimed in My Oldest. I'm just glad that I have one piece left for lunch tomorrow.

Zucchini Pie


1 pie crust, unbaked
Dijon mustard
1/4 cup butter
4 cups sliced zucchini
1 cup diced onion
1/2 cup fresh parsley, chopped
1/2 teaspoon salt
1/2 teaspoon pepper
1/2 teaspoon oregano, dried
1/4 teaspoon garlic salt
2 cups shredded cheese, I used a combination sharp cheddar and mozzarella
2 extra large eggs, beaten

Preheat the oven to 375 degrees.

Line a pie plate with the pie crust and brush with Dijon mustard. Set aside.

Melt butter in a large saute pan and add zucchini and onion. Saute for about 8 minutes. Add the parsley, salt, pepper, oregano and garlic salt. Toss to coat. Cool slightly and then add cheese and eggs and mix. Pour into the prepared pie crust and bake for about 25 - 30 minutes. Cool slightly before serving.


The zucchini pie is waiting to be eaten.

The last sunset of the vacation.


Food Tip of the Day #2

Having a dip such as Dill Dip in your refrigerator allows for many options during the week. It can be thinned with some half and half and used as a dressing for your favorite salad, mixed with diced cucumbers and sweet vadalia onions for a topping for grilled mahi mahi, spooned into hollowed out cherry tomatoes for a quick appetizer, or served as a dip with potato chips and cut up celery, carrots, and sugar snap peas.


Food Tip of the Day #1

When grilling salmon or any other firm fish such as halibut or swordfish for dinner, make an extra pound or two for fish tacos for the next day. With tortillas, shredded cabbage, a few lime slices, and a quick sauce of 1/2 cup mayonnaise, 1/4 cup sour cream and 1/2 teaspoon chilpolte powder on hand, dinner is ready without even having to think about it.


Lobster Rolls


Leftovers from 15 pounds of lobster claws and tails for dinner turn into the next day's lunch. After eating as much lobster was humanly possible, there still was enough left for me to make about Lobster Rolls for a few lucky family members.

With the ocean temperature hovering around 60 degrees, the morning was spent watching the brave souls dance in and out of the waves as jellyfish floated by. I gladly retreated to the kitchen to do little chopping and dicing for my Lobster Rolls. With chilled, cooked lobster in the frig, the rolls for lunch went together in a snap.

Having been spoiled with such good food and family fun on our vacation, I'll be reading my own blog to reminisce about the great time we had. I'll probably be repeating a few of the recipes too.

Lobster Rolls


makes 8 lobster rolls

about 2 1/2 pounds of cooked and chilled lobster
1 cup of celery, small dice
2 heaping tablespoons of mayonnaise
1/2 teaspoon of dried dill
juice of 1/2 lemon
8 hotdog buns
lemon wedges

Chop lobster into about 1-inch chunks. In a large bowl, combine lobster, celery, mayonnaise, dill, and lemon juice. Toss lightly to combine. Spoon a generous portion into hotdog buns. Serve with lemon wedges.


The Summer Sipper


A week at the Jersey Shore basking in the sun, eating home cooked meals as well as fried Oreos and thin crust pizza, and imbibing in cool libations is part of an ideal summer to me. I am lucky to be part of a family that loves good food. Vacationing with sisters, brothers, nieces, nephews, and grandparents means that the cooking duties are handled by different people each night. Sometimes a husband and wife team pair up, or a grandparent and grandkid, or two sister-in-laws join forces to create a memorable meal for all. Each brings their on tastes and cooking style to the dinner preparation. A bond is formed because family members who see each other only a couple times a year work together chopping, grilling, and serving their culinary creation. With extended family sharing dinner together, we reminisce about the past, tell stories about the days events, and plan for our future visits.

We have dined on a tomatoey fish stew loaded with scallops, mussels, clams, and mahi mahi called cioppino, lobsters, caprese salad and homemade peach and blueberry cobbler, and grilled tequila and lime chicken, steak and shrimp fajitas. A new drink creation is mixed up for happy hour every night and one of my favorites was made by my sister-in-law the mixologist.

The Summer Sipper is a refreshing concoction of limeade, mint, Pelligrino, and Malibu rum which is served on the rocks. I'll be enjoying this sparkling drink long after I return home from my days at the beach.

The Summer Sipper


makes enough for about 8 drinks

1 can frozen limeade concentrate
about 1 cup fresh mint leaves plus extra for garnish
4 cups water
1 cup Malibu rum
1 25-ounce Pelligrino

In a 2 quart pitcher, place 1/3 of the limeade concentrate and mint leaves. Smash the mint leaves with a wooden spoon to break up in small pieces. Add the remaining limeade concentrate, 4 cups water, the rum and Pelligrino and stir. Serve over ice with additional mint as a garnish.

Spicy Raspberry Barbecued Salmon


Spicy Raspberry Barbecued Salmon

I catered a graduation party for a client and 75 of their family and friends. The menu included Hot Wings, Roasted Vegetable Quesdillas, Pan Fried Onion Dip, Artichoke and Parmesan Dip and Crudite and Chips, Pulled Pork Sandwiches and Cole Slaw and Spicy Raspberry Barbecued Chicken. I made a double batch of the Spicy Raspbery Barbecue Sauce and decided to test it on my family.

Spicy Raspberry Barbecued Salmon was on the menu along with steamed basmati rice and a refrigerator salad - a salad that uses up what's in the refrigerator - any vegetable, cheese, and dressing that needs to be eaten before it passes its prime. Our salad consisted of romaine lettuce, chopped broccoli, diced cucumber, grated sharp cheddar, and a dressing made from the Dill Dip used when I served the Chicken Nuggets earlier in the week. To a cup of the Dill Dip, I add about 1/4 cup half and half to thin it out to dressing consistency.

No Thank You Boy wanted to help out and learned how to grill the salmon. Even though he has never grilled before, his favorite phrase was, "I know how to do that." He does not take direction well. He was in typical manform in that he thinks he is a Master of the Grill. A few tricky moments flipping the salmon, but all and all he will be my "Griller-of-the-Future." One less dinner time job for me.

Mixed reviews from the family. My Middle One really does not like fruit with grilled fish and meats. She ate her portion of salmon, but covered it with a good amount of tartar sauce. The remaining family members liked the spicy/sweet sauce that is a kicked up barbecue sauce.

I won't mind having a container of this in my refrigerator for emergency dinners.

Spicy Raspberry Barbecued Salmon

about 2 pounds of salmon fillets
1/2 cup of your favorite barbecue sauce
1 (10-ounce) jar seedless raspberry preserves
1/3 cup water
3 tablespoons Dijon mustard
2 tablespoons raspberry vinegar
2 teaspoons hot sauce

Prepare a hot grill. Season salmon with salt and pepper. Set aside.

In a small saucepan, combine barbecue sauce, preserves, water, dijon mustard, raspberry vinegar, and hot sauce. Bring to a boil and cook for 3 - 4 minutes until slightly thickened.

Grill salmon for about 4 - 5 minutes per side, basting with sauce. Watch for flare-ups. Serve with extra sauce.

Note - if the sauce thickens, warm and add a little water to thin.

Lazy Gal's Blueberry Crostata


My cooking and posts have taken on a summer tone. The easier the better. We still need to eat around our house, but I really haven't been in the mood to plan and shop for our meals. Pre-summer, I would plan out at least 5 meals and a couple desserts and a shopping list for my trip to the grocery store on a weekly basis. As summer has descended on our household, I have been making less frequent visits to the store and improvising with what is available in the freezer.


I ALWAYS have a homemade baked good on the counter. On a recent trip to Wal Mart, I stocked up on Oreos and Pepperidge Farm cookies to make up for the absence of treats at our house. No Thank You Boy has been begging me to make a "real blueberry pie" - aka a lattice topped blueberry pie - for about a week. I kind of gave in to his request making a Lazy Gal's Blueberry Crostata. A sheet of puff pastry from the freezer, a couple pints of blueberries from the fridge, and a sprinkle of raw sugar and voila! 20 minutes later a blueberry treat.

Thrill and amaze your family and friends with this crostata. Just don't tell them that you made it with one arm tied behind your back and one eye closed.


Lazy Gal's Blueberry Crostata

1 sheet of puff pastry, thawed
1 pint of blueberries
1/4 cup sugar
1/4 cup flour
1 teaspoon cinnamon
milk
raw or sprinkling sugar
vanilla ice cream

Preheat oven to 400 degrees. Line a baking sheet with parchment paper and set aside.

Unfold the pastry and roll out to about a 12 inch x 12 inch square. Place on parchment lined baking sheet. In a large bowl, combine blueberries with sugar, flour and cinnamon. Mound berry mixture in center of the pastry. Fold edges over of pastry over berries, pleating to make a circle. Brush with milk and sprinkle with sugar.

Bake for about 20 minutes, or until crust is golden and the berries begin to release their juice. Let cool for 5 - 10 minutes. Serve with vanilla ice cream.