Showing posts with label Appetizers and Small Plates. Show all posts

Honey Ham and Fresh Pineapple Pizza

Honey Ham and Fresh Pineapple Pizza
Your Easter dinner was a success!

The guests ate and drank and ate and drank their fill of mimosas, honey glazed ham, twice baked cheesy potatoes, pineapple bread pudding, roasted asparagus, french silk pie and more peanut butter filled chocolate eggs than you can count.

Some of the leftover ham was sent home with your relatives, but there is still 3 pounds of the spiral cut beauty sitting in your refrigerator.  After ham sandwiches, omelets filled with ham, and split pea soup with ham, what will you make with all that ham?

Honey Ham and Fresh Pineapple Pizza is what will be for dinner tonight.  Flour tortillas stand in for the crust and are topped with a spicy marinara sauce, monterey jack cheese, diced ham and pineapple and a sprinkling of herbs.  A few minutes in the oven is all that is need to melt the cheese and crisp up the crust.

Your family will never know you are serving "leftover ham," and there is no need to tell them ;)


Honey Ham and Fresh Pineapple Pizza

serves 4

4 (9-inch) flour tortillas
1/2 cup marinara sauce
2 tablespoons barbecue sauce
1 1/3 cups shredded monterey jack cheese
1 cup diced ham
1 cup diced fresh pineapple
dried oregano
dried basil
chopped fresh parsley

Preheat oven to 450 degrees.

Place tortillas on 2 large baking sheets.  Combine the marinara and barbecue sauces and spread about 2 heaping tablespoons on top of each tortilla.  Sprinkle 1/3 cup of the cheese on top of the sauce followed by 1/4 cup each of the ham and the pineapple.  Sprinkle with a little oregano and basil.

Bake in oven for 6 - 8 minutes or until the cheese is melted and slightly golden brown and the tortillas are crispy.  Let cool 2 - 3 minutes before cutting in pieces and sprinkle with the parsley.

Lemon Barbecued Shrimp

Lemon Barbecued Shrimp
With a spell of warm Spring weather over the past couple weeks, I dusted off the Weber grill and made a few dinners in the great outdoors.  First up was a platter of Lemon Barbecued Shrimp.  I love grilling because...

1.  I spend time outside
2.  Dinner cooks by itself with little help from me
3. No dirty pots and pans to wash

Lemon Barbecued Shrimp includes a homemade marinade with ingredients most kitchens have on hand.  Making your own marinades is a quick proposition.  With a mason jar, you can add all the ingredients and give it a vigorous shake.  Also, you control the ingredients that go in so you can make your homemade marinade as healthy - or not - as you would like.

After spending about 30 minutes in the marinade, the shrimp get a a double flavor boost from the tangy lemon barbecue sauce and the char or the grill.  Head outside and prepare this is a quick meal for your family.  And you will get the added benefit of getting a dose of vitamin D from some time spent in the sun.

Lemon Barbecued Shrimp

serves 4

for the mariande --
1/4 cup ketchup
3 scallions, thinly sliced
3 tablespoons lemon juice
1 tablespoon honey
1 tablespoon apple cider vinegar
1 tablespoon Worcestershire sauce
1 teaspoon sesame seeds
1/4 teaspoon allspice
1/2 teaspoon salt
1/2 teaspoon pepper

2 pounds extra large shrimp (16 - 20 count per pound), peeled and deveined with tails
12 inch wooden skewers

lemon wedges

In a mason jar with a lid, combine the marinade ingredients and shake well.  Place shrimp in a resealable bag and add about 2/3 of the marinade.  Place in refrigerator to marinate for about 30 minutes.

Heat grill to medium high.  While the grill is preheating, thread 4 shrimp on each skewer.  Grill for 3 - 4 minutes per side, brushing with remaining marinade during the last couple minutes.  Can be served straight from the grill or chilled with lemon wedges.

Chicken Parmesan Sliders


Chicken Parmesan Slider
We are getting back to the family dinner table at our house.

After a busy few weeks surrounding Thanksgiving, Christmas and New Year's, we fell out of the habit of eating dinner together as a family.   Sure we were all together for feasting on Christmas Eve and Day (I missed our family Thanksgiving dinner with an unfortunate case of the flu), but our typical weeknight meal was replaced with work, a track meet, or grabbing a quick bite at the local diner with friends.  I would love to say that each night at 6 p.m. we gather around the table for a well rounded meal with all family members present, but that is not typically the way dinner time flows in our kitchen.  We, like any other family, have made choices to participate in these activities and sometimes our family dinner time suffers.

When we returned home from visiting family in the Midwest, I made dinner for our family on Sunday night.  My Oldest had an invitation to go out with friends but declined.  She informed her friend,

"My Mom is making dinner tonight.  I am staying home."

So at 7:30 p.m. on a unseasonably warm winter evening in northern New Jersey, we all sat around our kitchen island and enjoyed conversation and Chicken Parmesan Sliders.  Smal, thin chicken cutlets were panko and Parmesan cheese coated and pan fried to a crunchy crispiness.  Topped with a homemade marinara sauce, melted mozzarella cheese and served on mini buns, we chatted about our day's events and the upcoming week when most of the family would be going back to work and school.

For a half hour, we shut out the technology-filled world and just ate dinner.  We may make eating dinner together more than a weekly habit.

Chicken Parmesan Sliders

makes 16 sliders

for marinara sauce --
marinara sauce (either make your own with my recipe or use your favorite store brand)
1 tablespoon olive oil
1/2 cup diced onions
3 garlic cloves, chopped
1 (28 ounce) can whole plum tomatoes, crushed by hand or a potato masher
1 teaspoon dried basil
1 teaspoon dried oregano
1/2 teaspoon dried thyme
1/2 teaspoon fennel seeds
1/4 teaspoon red pepper flakes
1 teaspoon salt

for chicken --
4 chicken breasts, boneless and skinless
2 cups panko
3 eggs, beaten
1 cup flour
1/3 cup grated Parmesan cheese
1/2 teaspoon dried basil
1/2 teaspoon dried oregano
salt and pepper
about 1/4 cup olive oil

1 cup shredded mozzarella cheese
16 mini buns

Preheat oven to 450 degrees.

To make marinara sauce --

In a medium sized saucepan over medium high heat add oil, onions and garlic.  Saute, stirring occasionally until translucent, about 6 - 8 minutes.  Add tomatoes, basil, oregano, thyme, fennel seeds, red pepper flakes, and salt.  Stir to combine and continue cooking over low heat for 15 minutes.  Season to taste.  Keep warm.

To make chicken --

Place chicken on a cutting board and slice lengthwise into 2 thin cutlets.  Slice each cutlet into 2 smaller pieces.

Place a cooling rack over a baking sheet and set aside.

In three separate shallow dishes place (1) panko, (2) eggs, and (3) flour, Parmesan cheese, basil, oregano, and a 1/2 teaspoon salt and 1/4 teaspoon pepper.  In a large saute pan over medium high heat, add the olive oil.  Dredge the chicken pieces first in the flour mixture then the eggs and finally the panko.  Pan fry the chicken for about 2 - 3 minutes per side or until lightly browned and the chicken is cooked through.  Remove to cooling rack and sprinkle lightly with salt.  Continue frying chicken in batches until all have been cooked.

To assemble the sliders, leave chicken on the baking rack on top of the baking sheet and top each piece with about 2 tablespoons each of the marinara sauce and mozzarella cheese.  Bake in oven until cheese is melted; about 3 - 5 minutes.  Remove chicken from oven and place in buns.  Serve.

**Note - to make Chicken Parmesan Sliders ahead of time --  Prepare the chicken and marinara sauce, cool and package for the refrigerator until dinner time.  Reheat the chicken topped with the marinara sauce and cheese in a 400 degree oven for about 10 minutes before serving on buns.

Buffalo Chicken Nachos

Buffalo Chicken Nachos
A Sunday afternoon in the Fall is No Thank You Boy's favorite time of the year.  Football games continue one right after another from early afternoon all the way into the late evening.  And an integral part of watching football games for him is the eating of football food.

Nachos are on every sports restaurant/bar menu with the usual ingredients of tortilla chips, seasoned ground beef, beans, cheddar cheese, tomatoes, lettuce, sour cream, salsa and guacamole.  This version of the pseudo-Mexican snack is good enough on its own, but I decided to change up a few ingredients to suit No Thank You Boy's spicy taste buds and affinity for chicken.  Buffalo Chicken Nachos combine shredded chicken with Frank's Hot Sauce and cheddar and blue cheeses on top of blue and white corn tortilla chips.  After a few minutes in a hot oven, the nachos are topped with celery, tomatoes, and scallions.

It is only 2 days until Sunday.  Make sure you have the ingredients to make Buffalo Chicken Nachos and sit back and cheer on your favorite football team.

Buffalo Chicken Nachos

a large bag of tortilla chips - corn or blue corn or a combo of both
3 cups cooked and shredded chicken
5 tablespoons hot sauce, or more to taste
3 cups shredded sharp cheddar cheese
1 cup crumbled blue cheese
6 scallions, chopped
3 celery ribs, small dice
1 medium tomato, small dice
sour cream for serving
salsa for serving

Preheat oven to 425 degrees.  Line an 18 x 10 inch baking sheet with parchment paper.  This is not necessary but makes clean up much easier.  :)

Place a layer of tortilla chips in the baking sheet overlapping some of the chips.  Make sure the pan is full of chips.

In a bowl, combine the chicken and hot sauce.  Spread the chicken evenly over the chips and sprinkle with the cheddar cheese and blue cheese.  Bake for 6 - 8 minutes or until the cheese is melted.

Remove baking sheet from oven and sprinkle the scallions, celery and tomato evenly over the melted cheese.

Serve with sour cream and salsa.

Beef Tenderloin Bites with Spicy Chile Jelly

Beef Tenderloin Bites with Chile Jam
I got flack from my brother-in-law the cattleman for my Meatless Monday post on Facebook that I was making a meatless spinach lasagna for dinner.  In honor of him and his cattle at Golden Oaks Beef, I present the recipe for Beef Tenderloin Bites with Spicy Chile Jelly.

I prepared this entree for a personal chef client this week.  Cubed beef tenderloin is marinated in spicy Asian chili and soy sauces then quickly cooked and tossed with red pepper jelly.  The dish contains the flavor combination of spicy, sweet and salty which is definitely a tasty one. 

With the short marinating time and less than 5 minutes to cook, dinner will be ready in no time at all.  Add a side of rice combined with steamed carrots and peas and it is time to eat.

Enjoy!

Beef Tenderloin Bites with Spicy Pepper Jelly

adapted from this recipe.  Included in this dish are a couple items that you probably do not keep in your pantry but, they are widely available in the specialty food aisle of most grocery stores.  Links are included to the brands that I used in making this dish.

serves 4

3 tablespoons chili garlic sauce
2 tablespoons soy sauce or tamari
2 teaspoons cornstarch
2 tablespoons peanut oil, divided
1 1/2 lbs beef tenderloin, cut in 1-inch cubes (can substitute sirloin or strip steak also)
3 tablespoons spicy red pepper jelly
4 cups cooked rice, kept warm
3 scallions, thinly sliced

Combine chili garlic sauce, soy sauce, cornstarch, and 1 tablespoon of the oil in a resealable bag and mix until thoroughly combined. Add cubed meat and toss to coat. Marinate for 30 minutes at room temperature or up to 4 hours in the refrigerator.

When ready to cook, heat 1 tablespoon of the remaining oil in a large nonstick frying pan or wok over medium-high heat. When oil shimmers, add the meat and cook until brown and caramelized on all sides, about 3 minutes for medium rare.  Add the pepper jelly and toss to coat.  Remove from pan and serve over rice and sprinkled with the scallions.

Note - this is a favorite recipe of my personal chef clients.  The dish can be made in advance and reheated when ready to serve.  After preparing the dish, cool completely and package for the refrigerator.  I like to package my prepared meals in these Pyrex dishesthat come with lids.  When ready to serve, remove lid and cover with paper towel to prevent splatters in your microwave.  Heat at 70% power for 30 second intervals, stirring to distribute the heat, until the meat is just heated through.  You want to only reheat the meal, not cook it so using the 70% power is important.  Remove from microwave and stir and serve.

Thanks to my personal chef friend Sandy Hall  for suggesting the recipe.

Grilled Old Bay Shrimp


A week of sun, sand and surf at the Jersey Shore is our summer vacation. We spend our time reading trashy magazines on the beach, floating on tubes in the ocean, digging super deep holes in the sand, concocting new drinks for happy hour, and discussing what we will have for dinner while we are still eating breakfast. Each night, a different group takes on dinner detail. It could be a couple, a bunch of kids, or Grandma and Grandpa who plan, cook, serve, and clean up our nightly feast.

When The Husband and I took our turn preparing dinner, we decided on a typical beach meal that we knew everyone would love. We dined on a couple appetizers of Garlic Clams on the Grill


and Grilled Old Bay Shrimp


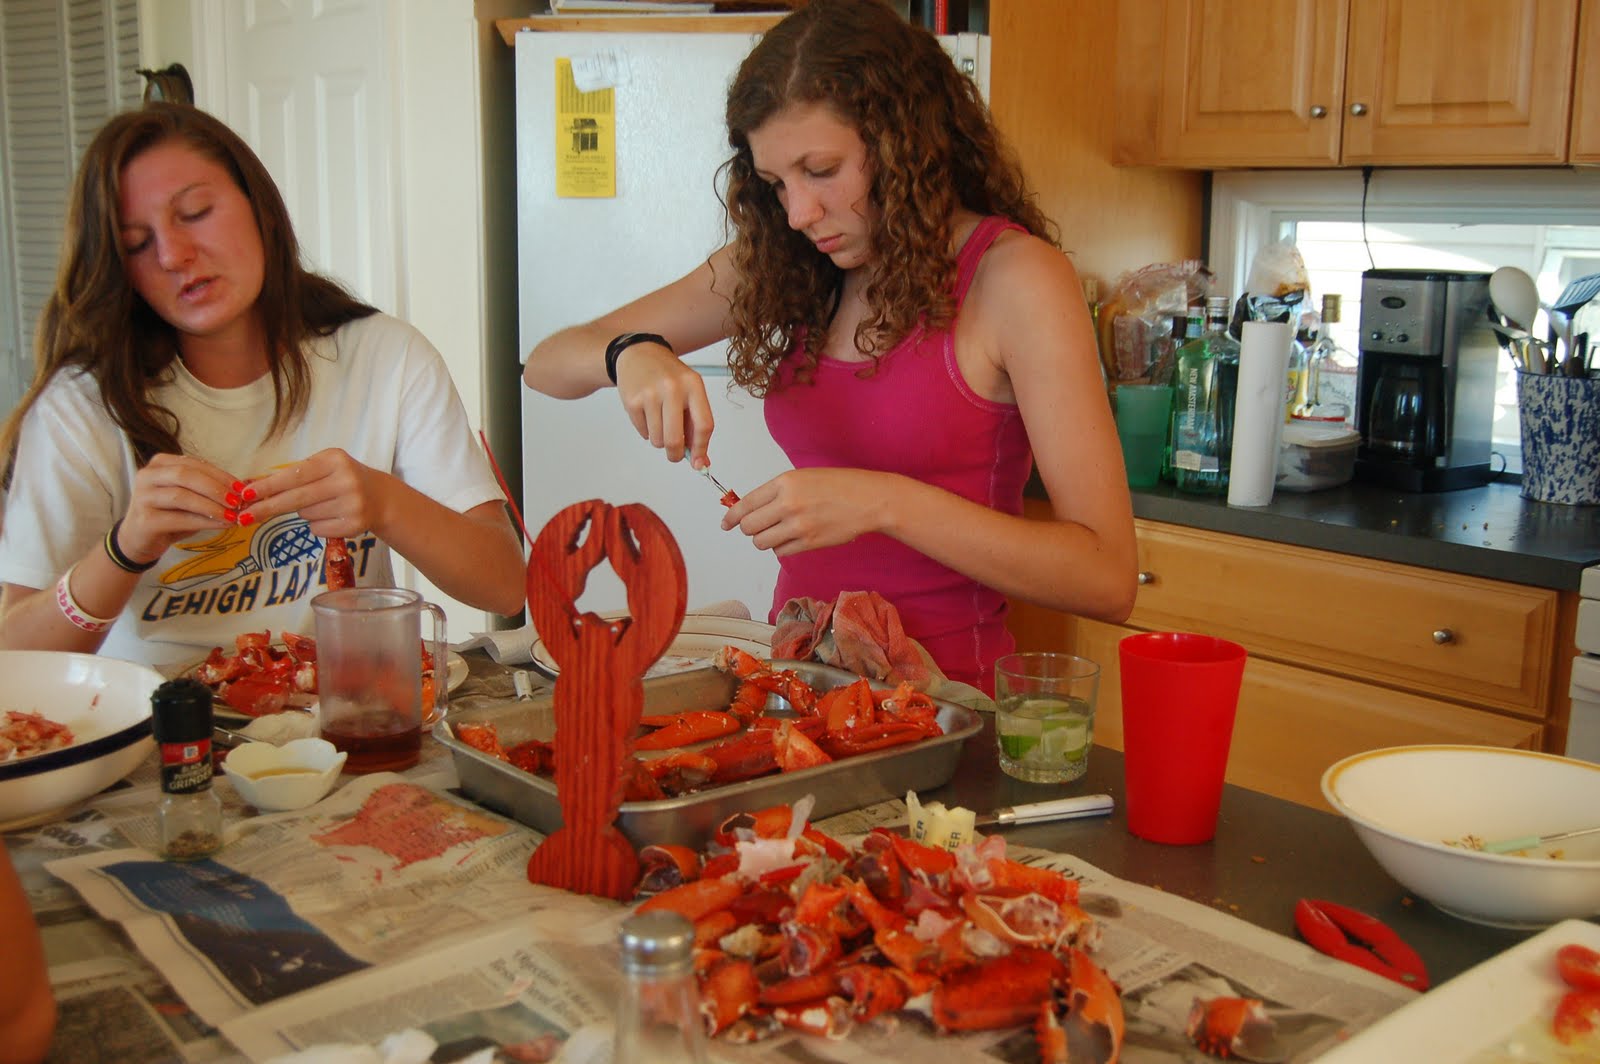
followed by 15 pounds of steamed lobster claws,


Sweet and Tangy Slaw


a huge caprese salad of fresh mozzarella, Jersey tomatoes, and basil drizzled with olive oil and balsamic vinegar, and crusty loaves of Italian bread.


The shrimp appetizer was the first to be served


and was gobbled up in no time.


After a request from Grandma for the recipe and the speed at which the shrimp disappeared, I decided that the incredibly easy recipe was a keeper.

The clams were devoured just as quickly with The Husband practically drinking the garlic infused wine sauce they were cooked in.

Next up were two huge pans of steamed lobster claws that we picked up earlier in the day from Point Lobster Company in Point Pleasant, New Jersey. This is the best way to have a lobster feast because the claws are all meat and by enlisting a couple family members as the crackers of the claws, retrieving the meat from the shells is a breeze.


The leftover lobster meat is removed from the shells by a couple more diners


and becomes tomorrow's lunch of Lobster Rolls.

Taking on the role of supervisor in the kitchen, I make sure that dinner runs smoothly. And with the help of many family members and a few cocktails, it always does.


Happy Summer!

Grilled Old Bay Shrimp
1/2 stick of butter melted and cooled
4 cloves of garlic chopped
1 1/2 teaspoons Old Bay Seasoning
2 pounds of large shrimp (21 - 25 per pound) peeled with tails on and deveined
about 24 (12 inch) wooden skewers, soaked in water for 10 minutes
spicy cocktail - there are many tasty store brands to choose from

In a small bowl, combine the butter, garlic and Old Bay Seasoning. Place shrimp in a large resealable bag and add the butter mixture. Squish around the contents of the bag so that all the shrimp are well coated with the marinade. Seal the bag and let the shrimp marinate for about 30 minutes in the refrigerator.

Meanwhile, prepare a hot grill and skewer the shrimp. To skewer the shrimp, lay 2 skewers parallel with each other and thread the top portion of about 5 shrimp onto each pair. By threading the shrimp on two skewers, it is easier to grill them as the shrimp does not spin around when being turned over on the grill.


Grill the shrimp for about 3 - 4 minutes per side. Be careful not to overcook the shrimp as they will be tough. Remove the skewers from the grill and take the shrimp off the skewers and place on a large serving dish. Serve with cocktail sauce if desired.

Print recipe

A special thanks to my nephew Will for being my photographer for the evening.


Roasted Salt and Pepper Garbanzo Beans


I like to snack.

Throughout the day, I try to eat healthy snacks so I can have a big bowl of ice cream or a few cookies with a glass of milk before heading off to bed. I don't like to go to bed on an empty stomach. Homemade trail mix with pecans, walnuts, dried cherries and semi sweet chocolate chips, granola bars, and cut up apples are just a few snacks I munch on during the day.

I am always on the lookout for a crunchy alternative to nuts. I stumbled upon a few articles and recipes that mentioned roasting garbanzo beans so I gave it a try. Garbanzo beans are also known as chickpeas and are commonly used in making hummus which is one of my favorite happy hour dips.

Roasted Salt and Pepper Garbanzo Beans are a crispy-crunchy snack that is delicious and nutritious. Nibble on a snack that is good for you while enjoying with a glass of wine.

Happy hour never had it so good.

Roasted Salt and Pepper Garbanzo Beans

2 (15-ounce) cans garbanzo beans or chickpeas
1 tablespoon olive oil
1 1/2 teaspoons salt
3/4 teaspoon pepper

Preheat oven to 425 degrees.

Drain garbanzo beans and rinse with cold water. Let sit in the stainer for 5 to 10 minutes so must of the water can drain off.

Line a large rimmed baking sheet with parchment paper and spread out the garbanzo beans. Drizzle with the olive oil and sprinkle with the salt and pepper. Roast in the oven for 35 - 45 minutes until crunchy and browned. Toss the garbanzo beans a couple times so they roast evenly. Taste the garbanzo beans half way through the roasting time and adjust the seasoning if necessary.

Remove from the oven and let cool. Serve.

Print recipe

Share/Bookmark


The Crab Cake


As a God-fearing, church-going Catholic, I follow the Lenten regulations of abstaining from meat on Fridays mainly because I want to improve my chances of making it to Heaven. It is only these Fridays during Lent that I crave a huge, juicy cheeseburger because I am "not supposed" to eat meat on these days.

As a backup to my burger desire, I keep a can of fresh crab meat on hand to make The Crab Cake instead. A mostly crab meat filled patty with barely enough egg and panko to bind it together reminds of warm summer days spent at The Shore instead of the burger of my dreams.

Crab cakes are a weekly request from my clients. I think I will put in a request to make them for myself this Friday.

The Crab Cake

Use crab meat from the refrigerated section near the seafood department of your local grocery store or Costco. I use Phillip's backfin or special varieties.

makes 12 crab cakes or about 4 servings

1/3 cup diced onion
1/3 cup diced celery
2 teaspoons Worcestershire sauce
1/2 teaspoon garlic powder
1 teaspoon Old Bay seasoning
1/4 teaspoon dry mustard
2 tablespoons chopped fresh parsley
1 egg
1 pound of fresh crab meat, either backfin or special varieties
1/4 cup mayonnaise
1/2 cup panko plus more for dredging crab cakes in before sauteing
canola oil and butter for frying

for classic tartar sauce --
1 cup mayonnaise
2 tablespoons sweet pickle relish
squeeze of lemon juice

shredded iceberg lettuce

In a large saute pan, heat about a tablespoon of canola oil and saute the onion and celery for 4 - 5 minutes. Remove from pan and allow to cool.

Meanwhile, in a large bowl, gently combine the Worcestershire sauce, garlic powder, Old Bay seasoning, dry mustard, parsley, egg, crab meat, 1/4 cup of mayonnaise, and 1/2 cup of panko and the onion-celery mixture. Make sure that you do not mix too much because you do not want to break up the crab pieces.

Using a 1/4 cup measure, form the crab mixture into 12 crab cakes. If you have time, refrigerate, covered for 30 minutes to help the crab cakes hold their shape while sauteing.

Heat a large saute pan to medium high. Drizzle about 1 - 2 tablespoons of oil and add 1/2 tablespoon of butter into pan. Place about 1 cup of panko in a shallow dish. Dredge each side of the crab cakes in the panko and saute for about 3 - 4 minutes per side or until golden brown. Remove from pan and drain on paper towels.

For the tartar sauce, in a small bowl combine the 1 cup of mayonnaise, pickle relish and lemon juice.

Serve crab cakes on top of shredded iceberg lettuce with a squeeze of lemon and classic tartar sauce.


Cinnamon Crunch Popcorn


Growing up, we had a Stir Crazy Popcorn Popper. By what seemed like magic, the popcorn popper would turn oil and corn kernels into an overflowing bowl of perfectly popped popcorn. The magic stirring wand on the base of the popper constantly moved the kernels insuring all the corn popped without burning. Adding a pat or two of butter to the special butter well on top of the popper allowed it to melt over the corn as it popped. The icing on the cake was that the plastic dome doubled as a bowl meaning less clean up after gorging on handful after handful of buttery popcorn.

When I had kids of my own, I first made microwave popcorn for them. Quick, convenient, and no mess to clean up, it was an ideal snack for a mom with 3 kids under 4 years old. As my kids got older, we experimented with making popcorn in a pot on the stove top. We liked the big, fluffy pieces of popcorn this method produced, and the popcorn did not have that processed taste like the microwave version. With lots of shaking of the heavy pot and steam sneaking out from under the lid, making popcorn was sometimes a dangerous cooking adventure for my kids and I.

When my daughter asked for a popcorn popper for Christmas a couple years ago, I headed to the Internet to do some research. There were fancy poppers which are miniature versions of the poppers used at carnivals and the circus. Fun but impractical. Where would I store that thing? There were poppers by major appliance makers each touting some special feature. But these poppers tended to be on the expensive side. I only wanted to buy a popcorn popper. Not a popper, chopper, dicer, mixer, and blender all in one.

Then I remembered the Stir Crazy Popcorn Popper of my youth and all the fun my best friend Susie and I had making bowls upon bowls of perfectly popped and buttered popcorn at our weekly sleepovers. I had found the popper for my daughter!

After over 2 years of near constant use, my daughter's Stir Crazy Popcorn Popper pops a beautiful bowl of popcorn every time. We usually are just butter and salt popcorn eaters. I decided it ws time to change it up and did a little experimenting to come up with with different flavored popcorns.

Cinnamon Crunch Popcorn was invented to satisfy my salty and sweet cravings. The corn is popped in a mixture of oil and sugar so each piece of popped corn in covered with a slightly crunchy sugary coating. The hot, just popped kernels are then tossed with a cinnamon, sugar and salt mixture for added flavor.

Make a double batch. Cinnamon Crunch Popcorn will disappear quicker than it took you to make it.


Cinnamon Crunch Popcorn
makes about 6 cups

2 teaspoons cinnamon
1 tablespoon sugar
1/2 teaspoon salt
1/4 cup popcorn
1/4 cup oil
2 tablespoons sugar

In a small bowl, combine cinnamon, 1 tablespoon of sugar, and the salt. Set aside.

Put oil, popcorn and remaining 2 tablespoons of sugar into the popper If using a Stir Crazy Popcorn Popper, it will do all the work for you. After the popcorn stops popping, flip over the dome and add the cinnamon mixture. Using a large spoon, toss to coat the popcorn evenly with the mixture. Serve immediately or spread on a large baking sheet to cool and package in an airtight container.

If using a pot with a lid, place it on the stove top over high heat. Add the oil, popcorn and remaining 2 tablespoons of sugar to the pot and place the lid on top. Start shaking the pot as soon as the corn starts to pop. Continue shaking until the popping almost stops. Remove quickly from heat, open lid and pour in cinnamon mixture over hot popcorn. Toss the popcorn and the mixture with a large spoon making sure all the popcorn is coated. Serve immediately or spread on a large baking sheet to cool and package in an airtight container.

Print recipe

Share/Bookmark


Ricotta Gnocchi in a Flash!


It is dinner time again. Every day like clockwork, it creeps up on you like a little kid waiting just around the corner to scare you. What will you make for dinner tonight?!

Check the freezer. You spy ice cream, a frozen pizza, a couple pounds of rock hard ground beef, Stouffler's Mac and Cheese, a container of frozen blueberries, a package of half-eaten hash brown patties. And then your eyes widen and your mouth curls into a smile. You see it. The large Ziploc bag of Ricotta Gnocchi you made last month just waiting for the Fresh Basil Marinara in the refrigerator.


You may be thinking that there is not a bag of frozen Ricotta Gnocchi in your freezer because it is too time consuming to make. And wouldn't it be just as easy to buy it from the grocery store? You would be wrong if you thought that. It only takes a short amount of time to make enough gnocchi for dinner and some for the freezer. And the store bought gnocchi will taste...well....store bought. With a quart of marinara on hand, a dinner that will be more satisfying than the frozen pizza you were thinking about eating will be ready in about the time it takes to boil water.

I have learned to do foods simply. Making meals with good ingredients and simple cooking techniques yields pleasing and scrumptious food. Ricotta Gnocchi is one such food.

Live to eat. Don't eat to live.


Ricotta Gnocchi in a Flash!
Recipe by personal chef Kris Etze

2 pounds ricotta cheese
all purpose flour (enough to fill the cheese container, leveled off)
1/2 teaspoon salt
fresh basil marinara
grated Parmesan cheese

Place the ricotta into a mixing bowl. Measure the exact amount of all purpose flour needed to fill the container. Level it off. Add to the ricotta cheese with the salt and blend well.

Take the dough and roll it onto 1 inch ropes.

Cut into 1/2 inch pieces. Press with your thumb to make an indentation or roll off a fork like traditional gnocchi.


Place prepared gnocchi onto a parchment paper lined baking sheet. They may be frozen at this point. Freeze, then place in Ziploc bags for later use. Fresh or frozen, to prepare gnocchi, bring a large pot of salted water to the boil. Add the gnocchi and return to boil. When the gnocchi float to the top they are done, about 3 - 5 minutes.


Fresh Basil Marinara Sauce
makes about 4 cups

2 tablespoons olive oil
1 small onion, diced
2 garlic cloves, minced
1 (28 ounce) can peeled whole plum tomatoes, chopped
1 teaspoon salt
red pepper flakes to taste
1 tablespoon sugar
2 stalks fresh basil leaves or 1 heaping teaspoon dried basil

In a saucepan over medium high heat, add the olive oil and onion. Saute for 6 - 8 minutes until the onions are translucent. Add the garlic and saute an additional minute. Carefully pour in the tomatoes and add the salt, red pepper flakes, and sugar. Stir and bring just to a boil. Turn the heat down to a simmer, add the basil and continue cooking for about 20 minutes.

Remove basil from the sauce. Cool, package and refrigerate until ready to enjoy.

Share/Bookmark

Mini Fried Chicken


I must admit that I have always been a little intimidated by fried chicken. That big pot of hot oil combined with a platter of cut up chicken waiting to be fried equates to a splattering mess in my mind. But deep fry just about anything, and it tastes good. Mini Fried Chicken is no exception.


To overcome my fried chicken phobia, I decided to bread and fry chicken wings. These smaller chicken parts are easy to handle, fry up in about 12 minutes and are fun to eat. They offer the same crunchy coating and tender, juicy meat as the larger chicken pieces do, but in a more compact package.


My Mini Fried Chicken is perfect for little hands or is a welcome addition to a football buffet. A big batch can be made ahead to party or dinner time and served at room temperature or reheated in a 350 degree oven for about 10 minutes.

I am now a frying fool because of this recipe.


Mini Fried Chicken
makes 50 pieces

1 cup flour
1 cup seasoned, fine bread crumbs
1/2 teaspoon paprika
1/4 teaspoon cayenne pepper
1/2 teaspoon salt
50 chicken wing segments
canola oil

In a large, shallow bowl, combine the flour, breadcrumbs, paprika, cayenne pepper, and salt. Dredge the chicken, a few pieces at a time, in the flour mixture making sure to shake off any excess flour. Place on a large baking sheet and refrigerate for 1 hour. Coat the chicken a second time with the flour mixture before frying.

Heat about 3 inches of canola oil in a large, high sided stock pot to 375 degrees. Deep fry about 8 - 10 pieces of chicken at a time for about 12 minutes, turning once. Drain on a wire cooling rack placed in a large baking sheet.

Serve immediately or cool completely and store in the refrigerator in a ziploc bag. Serve cold or reheat in a 350 degree oven for 10 minutes.

Chicken Caesar Salad Pizza


We eat a lot of pizza. It is that easy, go-to dinner when we are running late. It can be picked up at the local pizzeria, prepared with a premade crust such as Boboli, or come from the frozen foods section of the grocery store (only when desperate though).

I grew up on Barone's Pizza. The pizza of choice was a not too thin crust pizza loaded with sausage, mushrooms and cheese. A trip into Chicago always included a stop at Uno's for the best deep dish pizza around. When we moved to New Jersey, I was introduced to East Coast pizza. It is a huge, thin crust pizza which most people order with only cheese. This type of pizza seemed a little strange to me because it was lacking in the girth I was used to with my Chicago pizzas. I have learned to like Jersey pizza. I am not sure if there will ever be a love affair between us.

More times than I can count, I have made thin crust pizza and deep dish pizza. As we are in the midst of our 4th consecutive day of 90 degree temperatures, I decided to try a Chicken Caesar Salad Pizza which would not be as heavy as the typical cheesy pizza.


I started with my favorite pizza dough recipe, but you could use a premade crust too. Topped with Caesar dressing, Parmesan and mozzarella cheeses, grilled chicken and romaine lettuce, this pizza was a welcome change from most pizzas we eat.


On this night, I was the only diner at our dinner table. After a doctor's appointment for My Oldest and her 4 hour driver's education lesson, various friends of my kids visiting throughout the day, a thunderstorm, a meeting with a new client, a drive across town to drop off My Middle One at a sleepover, and sending No Thank You Boy and The Husband off to football practice, I relish the quiet time. I enjoyed the crisp salad topping the hot, cheesy pizza. And the accompanying glass of chardonnay wasn't too bad either.

I will be adding this pizza recipe to my files.


Chicken Caesar Salad Pizza

pizza dough* for 1 crust or a premade crust such as Boboli

*this recipe makes about 6 crusts

3 - 4 tablespoons cup Caesar salad dressing, divided
1/3 cup shredded Parmesan cheese, divided
1/2 cup shredded mozzarella cheese
about 1 cup cooked chicken strips, preferably grilled
1 heaping cup of shredded romaine lettuce
freshly ground black pepper

Preheat oven to 450 degrees.

In using fresh pizza dough, roll it out to a 12-inch circle. Place on a baking sheet or pizza stone. Bake for 8 - 10 minutes or until golden brown. Remove from oven. If using a premade crust, just place it on a baking sheet. There is no need to bake it.

Brush crush with about 2 tablespoons of the dressing and top with 1/4 cup of the Parmesan cheese and the mozzarella cheese. Top with the chicken and return the crust to the oven. Bake for about 5 - 8 minutes or until the cheese is melted. Remove from the oven and place on a cutting board.

In a bowl, toss the lettuce with about 1 tablespoon of the dressing and the 2 tablespoons of Parmesan cheese. Top pizza with the salad and cut into wedges. Top with freshly ground pepper if desired. Serve immediately.

Print recipe

Grilled Island Kebabs with Sugar & Spice Rub


Impromptu entertaining and summertime go hand in hand. Schedules are more relaxed, bedtimes are extended, and friends and family stop by just because. It is easy to grill up some burgers and hotdogs, but being a little more creative really doesn't take too much more work.

Inspiration for my cooking comes from many different sources. I read cooking magazines, cookbooks, newspapers, and blogs. I pick up the recipe cards on the counter at my local fish market. I ask friends what they are making for dinner. A visit to a farmers' market or ethnic store can expose me to ingredients I have not cooked with before. By purchasing a new vegetable or jar of homemade jam or chutney, I can spice up the meals I prepare for my family and friends.

Grilled Island Kebabs with Sugar and Spice Rub are quick to prepare and can be served as an appetizer or entree. Most ingredients for this chicken kebab with a kick are already in your pantry, and the mango chutney can be picked up at a specialty market or even in the aisles of your favorite grocery store.

When guests drop by, heat up the grill and serve some brie, crackers, and fruit while you enlist the help of a friend or two to help make the kebabs. Roast a pan of Crispy Parmesan Potatoes and toss mixed greens with balsamic vinaigrette. Dinner will be ready in less than an hour and your guests will be treated to tasty meal.

Look all around you for new cooking ideas. With a little creative cooking, your summer dining can a little spice to your life.


Grilled Island Kebabs with Sugar & Spice Rub
serves 4 - 5 as a main course or 8 - 10 as an appetizer

sugar and spice rub -
1/4 cup brown sugar
1 1/2 teaspoons seasoned salt
1/4 teaspoons pepper
1/2 teaspoon cayenne pepper
1/4 teaspoon cinnamon

20 chicken tenders, about 1 1/2 pounds
40 pineapple chunks
20 bamboo skewers
1/4 cup mango chutney such as Major Grey's Mango Chutney

Heat a grill to medium high heat.

In a small bowl, combine the rub ingredients. Place the chicken tenders in a large resealable bag and add the rub. Shake to coat the chicken thoroughly. Set aside while the grill heats up, about 15 - 20 minutes.

Remove the chicken from the bag and thread onto the skewers. Place one pineapple chunk on either end of the kebab with the chicken in the middle. Grill for about 6 - 8 minutes turning frequently so the rub does not burn. During the last couple minutes of grilling, brush the kebabs with the chutney.

Remove from grill and serve.

Print recipe

Sliding into Summer


The lazy days of summer have not been very lazy around our house yet. We have been greatly anticipating the end of the school year so that we could stroll on the beach, lay by the pool, and generally not adhere to any schedule. Self-inflicted activities for the kids, cooking for a couple clients for me, and a new job for The Husband has equated to a hectic first week of summer. The busy days coupled with my recent lack of fresh and new dinner ideas has resulted in my blog being sadly neglected.

I have managed to stop by my favorite blogs during the past week and one in particular gets a daily read from me. Big Red Kitchen is written by Robin Sue and in my next life I am going to come back as her. Loaded with recipes, party ideas, menu planning, and tales of her foodie travels, her blog always is an interesting read.

After opening my refrigerator this afternoon and noticing the empty shelves, I decided it was time to stock up on quick foods to heat and eat. First up on my list of items to make for my bare refrigerator was Robin Sue's recipe for White Castle Sliders. Mini burgers with onions and melted cheese are the perfect grab and go lunch, afternoon snack or dinner. Pair the sliders with California Cole Slaw, Fennel Apple Slaw with Blue Cheese, or Lemony Garbanzo and Edamame Salad for a complete meal.

Make a double batch of these tasty burgers so you will have enough for the refrigerator and some for the freezer.

Thanks Robin Sue!!

Sliders
Sliding into Summer Sliders
adapted from a recipe on Big Red Kitchen

makes 24
1/2 cup dried onion flakes
about 1 1/2 pounds ground beef - 90/10 ground beef
seasoned salt
pepper
6 slices American cheese, cut into 4 squares
24 small party rolls- I use Martin's Potato Bread Party Rolls

Preheat oven to 400 degrees.

Evenly spread the onions on the bottom of a 9x13 inch baking dish. Gently press the ground beef on top of the onion flakes. Press evenly making one giant pattie. Sprinkle with seasoned salt and pepper. Bake in a 400 degree oven for 10 - 15 minutes. Using a paper towel, pat the excess grease from the top of the pattie. Cut into 24 patties and top with cheese. Return to oven for 1 more minute. Slice open and separate each party roll. Place bottom of rolls on a large platter. Using a spatula lift pattie with onion layer onto each bun bottom. Top each slider with the bun lid.

Note- Store these upside-down in an airtight container in the refrigerator. This will prevent the bottom bun from getting soggy from the onion layer. To reheat, place a few on a microwave safe plate and heat in the microwave for 20 seconds then 5 second increments after that until warm through.