Showing posts with label Sandwiches. Show all posts

Chicken Parmesan Sliders


Chicken Parmesan Slider
We are getting back to the family dinner table at our house.

After a busy few weeks surrounding Thanksgiving, Christmas and New Year's, we fell out of the habit of eating dinner together as a family.   Sure we were all together for feasting on Christmas Eve and Day (I missed our family Thanksgiving dinner with an unfortunate case of the flu), but our typical weeknight meal was replaced with work, a track meet, or grabbing a quick bite at the local diner with friends.  I would love to say that each night at 6 p.m. we gather around the table for a well rounded meal with all family members present, but that is not typically the way dinner time flows in our kitchen.  We, like any other family, have made choices to participate in these activities and sometimes our family dinner time suffers.

When we returned home from visiting family in the Midwest, I made dinner for our family on Sunday night.  My Oldest had an invitation to go out with friends but declined.  She informed her friend,

"My Mom is making dinner tonight.  I am staying home."

So at 7:30 p.m. on a unseasonably warm winter evening in northern New Jersey, we all sat around our kitchen island and enjoyed conversation and Chicken Parmesan Sliders.  Smal, thin chicken cutlets were panko and Parmesan cheese coated and pan fried to a crunchy crispiness.  Topped with a homemade marinara sauce, melted mozzarella cheese and served on mini buns, we chatted about our day's events and the upcoming week when most of the family would be going back to work and school.

For a half hour, we shut out the technology-filled world and just ate dinner.  We may make eating dinner together more than a weekly habit.

Chicken Parmesan Sliders

makes 16 sliders

for marinara sauce --
marinara sauce (either make your own with my recipe or use your favorite store brand)
1 tablespoon olive oil
1/2 cup diced onions
3 garlic cloves, chopped
1 (28 ounce) can whole plum tomatoes, crushed by hand or a potato masher
1 teaspoon dried basil
1 teaspoon dried oregano
1/2 teaspoon dried thyme
1/2 teaspoon fennel seeds
1/4 teaspoon red pepper flakes
1 teaspoon salt

for chicken --
4 chicken breasts, boneless and skinless
2 cups panko
3 eggs, beaten
1 cup flour
1/3 cup grated Parmesan cheese
1/2 teaspoon dried basil
1/2 teaspoon dried oregano
salt and pepper
about 1/4 cup olive oil

1 cup shredded mozzarella cheese
16 mini buns

Preheat oven to 450 degrees.

To make marinara sauce --

In a medium sized saucepan over medium high heat add oil, onions and garlic.  Saute, stirring occasionally until translucent, about 6 - 8 minutes.  Add tomatoes, basil, oregano, thyme, fennel seeds, red pepper flakes, and salt.  Stir to combine and continue cooking over low heat for 15 minutes.  Season to taste.  Keep warm.

To make chicken --

Place chicken on a cutting board and slice lengthwise into 2 thin cutlets.  Slice each cutlet into 2 smaller pieces.

Place a cooling rack over a baking sheet and set aside.

In three separate shallow dishes place (1) panko, (2) eggs, and (3) flour, Parmesan cheese, basil, oregano, and a 1/2 teaspoon salt and 1/4 teaspoon pepper.  In a large saute pan over medium high heat, add the olive oil.  Dredge the chicken pieces first in the flour mixture then the eggs and finally the panko.  Pan fry the chicken for about 2 - 3 minutes per side or until lightly browned and the chicken is cooked through.  Remove to cooling rack and sprinkle lightly with salt.  Continue frying chicken in batches until all have been cooked.

To assemble the sliders, leave chicken on the baking rack on top of the baking sheet and top each piece with about 2 tablespoons each of the marinara sauce and mozzarella cheese.  Bake in oven until cheese is melted; about 3 - 5 minutes.  Remove chicken from oven and place in buns.  Serve.

**Note - to make Chicken Parmesan Sliders ahead of time --  Prepare the chicken and marinara sauce, cool and package for the refrigerator until dinner time.  Reheat the chicken topped with the marinara sauce and cheese in a 400 degree oven for about 10 minutes before serving on buns.

Sweet Onion Chicken Teriyaki Sandwich

Sweet Onion Chicken Teriyaki Sandwich
A new Subway opened in our town about 4 months ago. What a hoopla surrounded the shiny, new dining option as there is only one (a Burger King) fast food joint in our community. My kids love a good Subway sandwich just as much as the next teenager and, No Thank You Boy favors the sweet onion chicken teriyaki sandwich. What is not to love about a footlong squishy white roll loaded with teriyaki sauced chicken, lettuce, tomato, and onions all slathered in a sweet onion sauce?

I like a good fast food meal, albeit infrequently, just as much as the next person. Just last week I had my bi-annual Big Mac Value Meal. Being that I like to recreate many meals I have tried at restaurants, (example #1 - The Mini Mac), it was time I made Subway's Sweet Onion Chicken Teriyaki sandwich.

I Googled, Yahooed, and Binged my way around the World Wide Web as I searched for the recipe that would recreate Subway's famous sandwich.  With bits and pieces from the recipes I found through my search, I struck upon the rendition that I thought would recreate the sandwich the best.  My recipe included grilling the chicken which was marinaded in a homemade teriyaki sauce and serving it on long soft white rolls with a quick-to-make sweet onion sauce, shredded lettuce, and sliced tomatoes and onions, was deemed a success by No Thank You Boy and My Middle One.

"It is good.  Really good.  Even better than the chicken teriyaki sandwich at Subway.  The sauce is not as sticky sweet.  I like this one even more than the one at Subway."

--No Thank You Boy, August 10, 2011

Success!  I prepped the sandwich ingredients in the late afternoon so when dinner time rolled around, all I had to do was reheat the chicken (just like they do at Subway) and assemble the sandwiches.  And with all the ingredients packaged up for the refrigerator, the kids could make their own sandwiches the next day for lunch while I was at work.  Yea!

Sweet Onion Chicken Teriyaki Sandwich

serves 4

1 pound boneless chicken breast, cut in thin strips

teriyaki marinade --
1/4 cup soy sauce
1/2 cup pineapple juice
1 teaspoon dried minced onions
1/4 cup brown sugar
1 tablespoon rice wine vinegar
1/2 teaspoon garlic powder
1/2 teaspoon ground ginger
1/4 teaspoon pepper

sweet onion sauce --
1/2 cup light corn syrup
1 tablespoon dried minced onions
1 tablespoon red wine vinegar
1 tablespoon white vinegar
1 tablespoon balsamic vinegar
1 teaspoon brown sugar
1/8 teaspoon poppy seeds
1/8 teaspoon salt
pinch of pepper

4 sub rolls
shredded lettuce
sliced tomatoes
sliced onions
sliced cucumbers

In a large resealable bag, place the teriyaki marinade ingredients and the chicken.  Let chicken marinate for about 1 hour.

Meanwhile, in a small sauce pan over medium high heat, combine the sweet onion sauce ingredients.  Bring to a boil while stirring to combine.  Add 2 tablespoons of water and stir.  Set aside.

Heat a grill or grill pan to medium high heat.  Remove the chicken from the marinade and grill for 2 - 3 minutes per side or until cook through.

To serve, slice rolls and top with chicken and desired toppings.  Drizzle with the sweet onion sauce and enjoy!

Chicken Souvlaki Pitas

Chicken Souvlaki Pitas

If - and that is a capital I capital F if - I am really organized in the morning, my dinner prep starts before I leave for work to cook for another family.  But if the stars and moons align during my morning routine, I can chop a few vegetables, slice some chicken breasts or mix up a marinade to make dinner time a little less hurried.

Chicken Souvlaki Pitas were on my menu for Monday night's dinner.  Lemon and oregano marinated chicken was grilled and tucked into pitas along with chopped lettuce, tomatoes, and cucumbers and drizzled with a Greek yogurt dressing.  I managed to mix up the marinade in the morning so the chicken could benefit from a long soak.  Even if your chicken marinates for as little as 30 minutes just before grilling, it will still have have loads of flavor.

This is one of those meals that can be tailored to the quirky flavor preferences of your family.  Your "No Thank You Boy" can eat just the chicken.  The starving softball player will eat two loaded pitas with all that is offered.  And The Husband that is working late will have a dinner that tastes like it was just made after a quick reheat of the grilled lemon chicken in the microwave.

And if you can manage to grill up a couple extra chicken breasts and chop some additional vegetables, you will have tomorrow's lunch waiting in the refrigerator in the morning.  It will be a lunch your co-workers will envy.


Chicken Souvlaki Pitas

adapted from this recipe in the March 2011 issue of  Cooking Light magazine

makes 8 half pita sandwiches

1 (6 ounce) container plain Greek yogurt
1/4 cup shredded cucumber
1/4 cup lemon juice, divided
1/4 teaspoon garlic salt
1/4 cup olive oil
1 teaspoon oregano
1/4 teaspoon salt
1/4 teaspoon pepper
1 1/2 pounds chicken breasts, boneless and skinless and sliced into thin fillets
4 (6-inch) pitas, cut in half
shredded lettuce
chopped cherry tomatoes
thinly sliced cucumber
thinly sliced red onion

In a small bowl, combine the yogurt, cucumber, 1 tablespoon lemon juice, and garlic salt.  Set aside.

In a large resealable bag, combine the remaining lemon juice, olive oil, oregano, salt, and pepper.  Add the chicken and seal bag.  Make sure the marinade covers all the chicken.  Marinate the chicken in the refrigerator for 30 minutes up to overnight.

Heat a grill pan to medium high heat.  Remove the chicken from the marinade and grill for about 2 minutes per side or until the chicken is just cooked through.  Remove chicken to a plate and cover with foil.

To serve, open one of the pita halves and fill with some of the lettuce, tomatoes, cucumbers, and red onions.  Slice the chicken in thin pieces and add some to the pita.  Drizzle with the cucumber sauce and serve.  Fill the remaining pitas in the same manner.

Crock Pot Hoagies


Rarely do I post recipes that I find in cookbooks, magazines or blogs. My feeling is that if a recipe has already been published, why just rewrite the recipe and publish it again? But every once in a blue moon, I run across a recipe that is so unique and delicious and easy to prepare, that I feel the need to share it.


Crock Pot Hoagies is one such recipe.  All of the ingredients for a hoagie sandwich are stuffed between slices of a large loaf of artisanal bread and heated until hot and melty and just plain good -- in your crock pot!  Slices of Virgina ham, Capicola, salami, and provolone cheese and layered with sweet peppers, red onions and Italian spices and make a meal that is waiting for you instead of you waiting for it.


Thanks Robin Sue for another fantastic recipe.  Check out her blog Big Red Kitchen for many dinner, lunch, breakfast, and dessert recipes and ideas.

Crock Pot Hoagies

serves 6

Adapted from a  recipe on the Big Red Kitchen blog. This recipe uses a  6-quart oval crock pot.  If your loaf of bread is too large for your crock pot, slice off some of the end.  Use thin sliced meats and cheeses in this sandwich.

one oval loaf artisan bread - make sure it fits in your crock pot
18 slices provolone
18 slices Virginia ham
18 slices sweet or hot Capicola
18 slices Genoa Salami
sweet pepper rings
thin red onion slices
olive oil
oregano and basil
Large 6 quart oval crock pot

Slice bread 13 times, almost all the way through but leaving 1/2 inch space at the bottom. Layer three slices of cheese and top with 3 slices each of ham, Capicola, and Salami. Top with pepper rings and onions. Sprinkle with oregano and basil and repeat 5 times. Fold each bundle in half and tuck down between every other slice of bread to create 6 sandwiches. The sandwich may have "arched" its back, gently push down and wrap tightly in one then a second piece of heavy foil.

Place in crock pot on top of a small aluminum foil pan or balls of foil so it does not touch bottom of insert. Pour in 1/3 cup of water (I never like to have a "dry" crock pot, it just seemed to make sense to me to have a little water in there), it does nothing for the sandwich since it is wrapped up so tightly in foil. Cover and cook on low for 2-4 hours.

Remove foil-wrapped sandwich from crock pot.  To serve, cut each sandwich apart, drizzle the insides lightly with olive oil, and enjoy. Makes six sandwiches with the center two being quite generous in size.

Note- you may not need all the meat and cheese as the sandwiches on the ends are a bit smaller and will not hold as much.  Since the sandwich is wrapped in foil, it does not get soggy.  it is hot and steamy with the ham, Capicola, salami, and cheese all melted together.

Share/Bookmark

Barbecued Pork Tenderloin Sliders


I have a confession to make. I don't like making dinner at dinner time. I want my dinner waiting for me instead of rushing around the kitchen to get supper on the table during the generally hectic 5 - 7 pm time slot each weekday. My Oldest is always starving when she comes home from a field hockey game. My Middle One usually asks what's for dinner even before she has had breakfast. And No Thank You Boy is looking for dinner as soon as he walks in the door from football practice.

My kind of dinners are the ones that are waiting for my family in the refrigerator and taste like they were just made. With a quick reheat on the stovetop or in the microwave, dinner can be ready in no time. Barbecued Pork Tenderloin Sliders is one such meal.

My crock pot usually helps me make Pulled Pork Sandwiches and they are a crowd pleaser any time of the year. With sliders still a hot trend in the world of food, I updated my pulled pork recipe with a quick and just as tasty version. After a rub and a roast, pork tenderloins are sliced thin and slathered with barbecue sauce. Served on slider rolls (many bread companies are now making these mini rolls or pick some up at your local bakery) along with tangy cole slaw, these 3-bite sandwiches are great for tailgates, parties, or dinner.

Make a batch today. Dinner will be a no-brainer.

Barbecued Pork Tenderloin Sliders
Print recipe

makes about 16 sliders

for the sliders --
3 to 3 1/2 pounds of pork tenderloin
olive oil
Penzey's Galena Street Spice Rub or your favorite spicy grill seasoning
1 1/2 cups barbecue sauce. I use Sweet Baby Ray's Barbecue Sauce

for the cole slaw --
1/4 cup canola oil
1/3 cup red wine vinegar
1 tablespoon sugar
1/2 teaspoon celery seed
3/4 teaspoon salt
1/4 teaspoon pepper
a few shakes of hot sauce
8 cups of thinly shredded green cabbage

16 slider rolls

Preheat oven to 425 degrees.

Rub the tenderloins with olive oil and generously sprinkle with the spice rub. Place the tenderloin on a rimmed baking sheet and roast for 20 - 25 minutes or until the internal temperature is about 140 degrees. Remove from oven and let cool.

With a sharp knife, thinly slice the tenderloin and place in a pot over medium heat. Add the barbecue sauce and about 1/3 cup water and gently stir to combine. Heat the pork and barbecue sauce for about 15 minutes until it is hot and bubbly.

Meanwhile, make the cole slaw. In a large bowl, whisk the canola oil, red wine vinegar, sugar, celery seed, salt, pepper and hot sauce. Add the cabbage and toss to coat. Set aside.

To serve, open a roll and top with the cole slaw and the barbecued pork tenderloin. Place the top of the roll on the pork and serve.

Share/Bookmark


Grilled Old Bay Shrimp


A week of sun, sand and surf at the Jersey Shore is our summer vacation. We spend our time reading trashy magazines on the beach, floating on tubes in the ocean, digging super deep holes in the sand, concocting new drinks for happy hour, and discussing what we will have for dinner while we are still eating breakfast. Each night, a different group takes on dinner detail. It could be a couple, a bunch of kids, or Grandma and Grandpa who plan, cook, serve, and clean up our nightly feast.

When The Husband and I took our turn preparing dinner, we decided on a typical beach meal that we knew everyone would love. We dined on a couple appetizers of Garlic Clams on the Grill


and Grilled Old Bay Shrimp


followed by 15 pounds of steamed lobster claws,


Sweet and Tangy Slaw


a huge caprese salad of fresh mozzarella, Jersey tomatoes, and basil drizzled with olive oil and balsamic vinegar, and crusty loaves of Italian bread.


The shrimp appetizer was the first to be served


and was gobbled up in no time.


After a request from Grandma for the recipe and the speed at which the shrimp disappeared, I decided that the incredibly easy recipe was a keeper.

The clams were devoured just as quickly with The Husband practically drinking the garlic infused wine sauce they were cooked in.

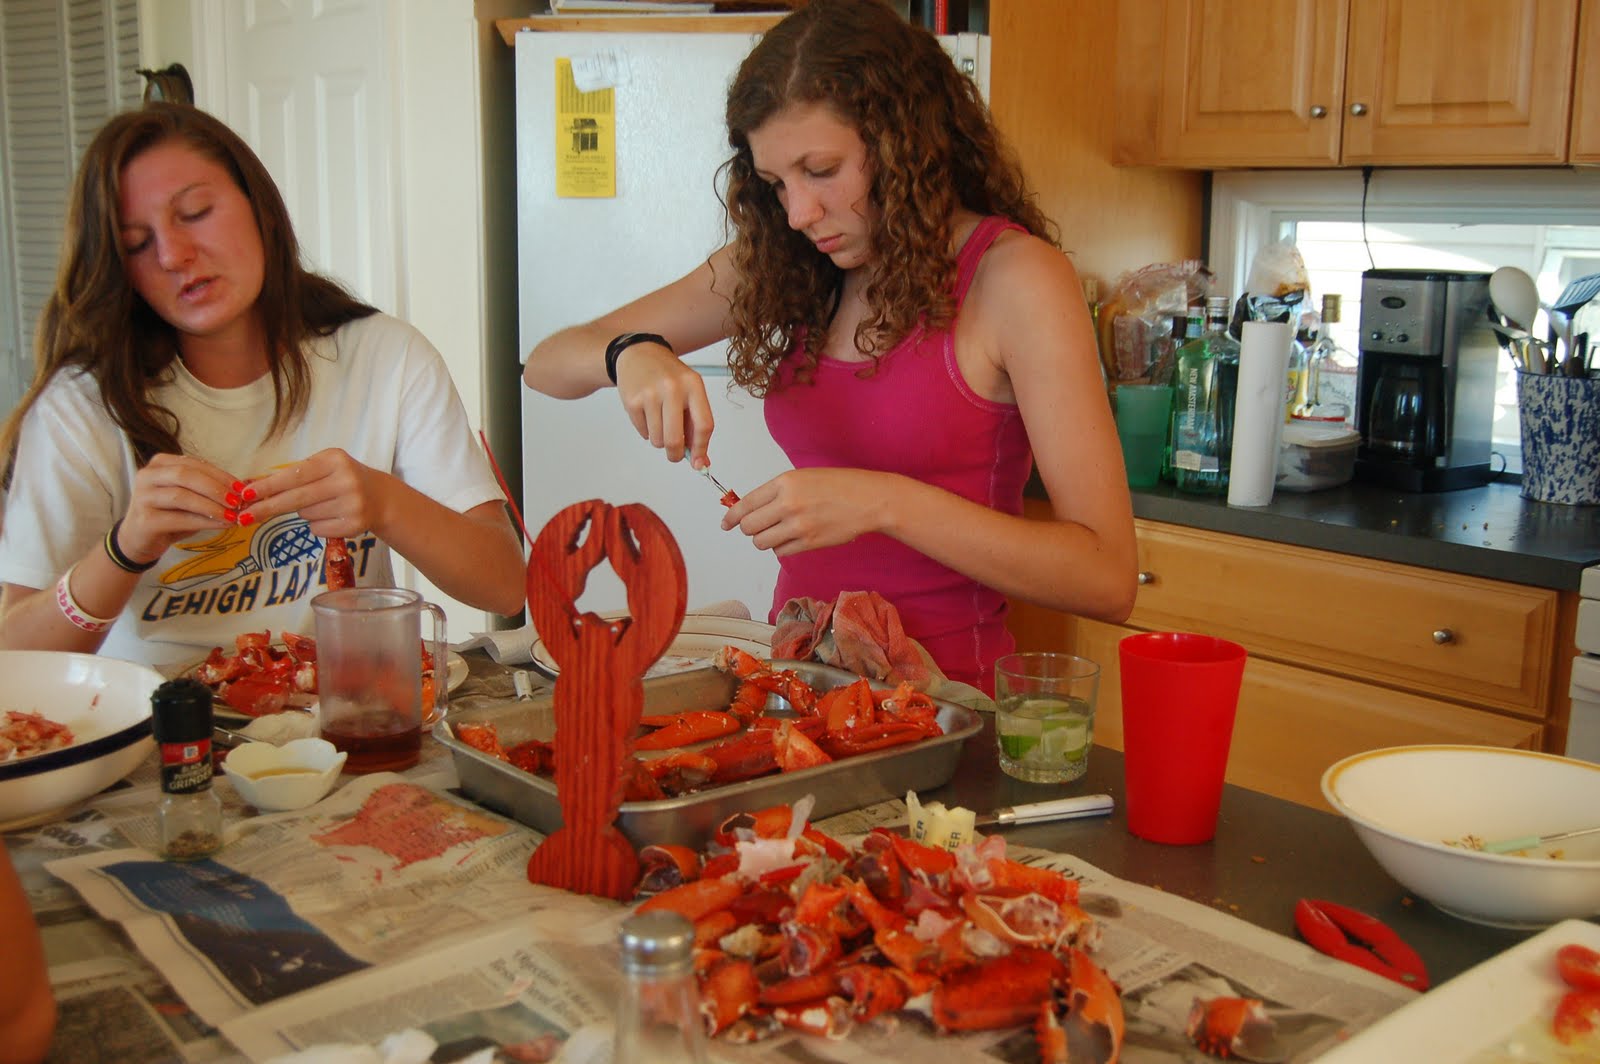
Next up were two huge pans of steamed lobster claws that we picked up earlier in the day from Point Lobster Company in Point Pleasant, New Jersey. This is the best way to have a lobster feast because the claws are all meat and by enlisting a couple family members as the crackers of the claws, retrieving the meat from the shells is a breeze.


The leftover lobster meat is removed from the shells by a couple more diners


and becomes tomorrow's lunch of Lobster Rolls.

Taking on the role of supervisor in the kitchen, I make sure that dinner runs smoothly. And with the help of many family members and a few cocktails, it always does.


Happy Summer!

Grilled Old Bay Shrimp
1/2 stick of butter melted and cooled
4 cloves of garlic chopped
1 1/2 teaspoons Old Bay Seasoning
2 pounds of large shrimp (21 - 25 per pound) peeled with tails on and deveined
about 24 (12 inch) wooden skewers, soaked in water for 10 minutes
spicy cocktail - there are many tasty store brands to choose from

In a small bowl, combine the butter, garlic and Old Bay Seasoning. Place shrimp in a large resealable bag and add the butter mixture. Squish around the contents of the bag so that all the shrimp are well coated with the marinade. Seal the bag and let the shrimp marinate for about 30 minutes in the refrigerator.

Meanwhile, prepare a hot grill and skewer the shrimp. To skewer the shrimp, lay 2 skewers parallel with each other and thread the top portion of about 5 shrimp onto each pair. By threading the shrimp on two skewers, it is easier to grill them as the shrimp does not spin around when being turned over on the grill.


Grill the shrimp for about 3 - 4 minutes per side. Be careful not to overcook the shrimp as they will be tough. Remove the skewers from the grill and take the shrimp off the skewers and place on a large serving dish. Serve with cocktail sauce if desired.

Print recipe

A special thanks to my nephew Will for being my photographer for the evening.


Grilled Chicken Caprese Sandwich


Lately, I am hot, tired, and hungry at the end of the day. And the other 4 people in our home are also in varying stages of hot, tired, and hungry as dinner time rolls around. The temperatures have been stagnant for the past month with 90+ degree days and humidity as thick as pea soup. Even with the air conditioner running almost nonstop (with the tiny dials on the electrical meter spinning at dizzying speeds), preparing a hot dinner sounds as appealing as a stroll across the scorching sand of the Jersey Shore without flip flops on a July afternoon.

With tomatoes just beginning to turn to a beautiful red hue, I decided to prepare a simple, yet oh so satisfying sandwich for dinner last night. The Grilled Chicken Caprese Sandwich is loaded with grilled chicken tenders bathed in balsamic vinegar and olive oil, juicy tomatoes, thickly sliced mozzarella, charred red peppers, and just picked basil all piled on a bakery fresh roll.

And the beauty of the sandwich is that it can be tailored to the multitude of tastes of the diners at your dinner table. A couple members of my family enjoyed sandwiches filled with all the offerings while others opted for only chicken, mozzarella, and red peppers. My Middle One chose to have chicken, tomatoes and mozzarella as her sandwich of choice last night. Suit yourself my Mom used to say.

As the temperatures continue to hover at uncomfortable levels, I see many more Grilled Chciekn Caprese Sandwiches appearing at our dinner table.


Grilled Chicken Caprese Sandwiches

makes 5 sandwiches

1 1/2 pounds chicken tenders
olive oil
salt and pepper
balsamic vinegar
2 large balls of fresh mozzarella
2 large tomatoes
1 (12 ounces) jar roasted red peppers, drained
about a dozen large fresh basil leaves
5 long rolls, split

Heat a grill or grill to high. Season the chicken with salt and pepper and grill for about 3 - 4 minutes per side or until cooked through. Remove from grill and place in a shallow dish. Drizzle with about 2 - 3 tablespoons of balsamic vinegar and 2 tablespoons of olive oil.

For each sandwich, open one of the rolls and top with a couple of the chicken tenders. Layer the tomato, mozzarella, roasted red pepper, and basil leaves on top. Drizzle the top roll with a little more balsamic vinegar and olive oil and then place on top of the sandwich. Slice in half and serve.


Share/Bookmark

Crock Pot Italian Beef Sandwiches

Crock Pot Italian Beef Sandwiches
Tailgate - [teyl-geyt] adjective - relating to or pertaining to a picnic set up on a tailgate.

Who would think that eating and drinking in a parking lot surrounded by rows and rows of cars, buses, and RVs could be so much fun?! Food tastes better and a cold beer is that much more thirst quenching when served out of the back of your car while enjoyed with good friends at a sporting event on the outskirts of a huge sports arena.

Spending an afternoon and evening at a college lacrosse tournament, the highlight for me was the tailgate. My contribution to the parking lot picnic was Crock Pot Italian Beef Sandwiches. Thin sliced deli roast beef is combined with roasted red peppers, peppperoncinis, dried thyme and oregano and beef stock. If you are in a hurry, just a couple hours on High are all that is needed to make these satisfying sandwiches which taste like you spent all day preparing them. To make your sandwich more parking lot-worthy, add a generous squirt of Kraft Sharp Cheddar Easy Cheese

Eating out of the back of your car never tasted so good.

No cheese, please.

Crock Pot Italian Beef Sandwiches

serves 12

3 pounds of thin sliced deli roast beef
4 cups of beef stock
1 teaspoon dried thyme
1 teaspoon dried oregano
1 jar (12 ounce) sliced pepperoncinis
1 jar (12 ounce) sliced roasted red peppers
12 long rolls, split
1 can Kraft Sharp Cheddar Easy Cheese

Place all the ingredients in crock pot and stir to evenly distribute. Set crock pot to High and cook for 2 - 3 hours or set to Low for 5 - 6 hours.

To serve, put a generous amount of the beef and peppers into a roll and drizzle with the broth. Squirt cheese on top if desired.

The Perfect Breakfast Sandwich


Breakfast is the most important meal of the day. We have been told this for years. It is the meal that jump starts the day. In the warm summer months, a smoothie whipped up with nonfat Greek yogurt and ripe strawberries, peaches and plums is a standard breakfast at our house. But as the warm days give way to cold and dark winter mornings, something a little more hardy and not so healthy is a grab and go meal that can be eaten with one hand.

I have loved the American institution that is the Egg McMuffin for as long as I can remember. The Perfect Breakfast Sandwich was created to fill my need for this McDonald's breakfast staple when there was not a McDonald's in sight. The English muffin is made with white flour, the egg is high in cholesterol, the ham and American cheese are loaded with fat, and the butter is full of calories, but boy does this morning sandwich sure taste good. On occasion, I have been known to make a half dozen of The Perfect Breakfast Sandwich, wrap each in parchment paper, and store them in the refrigerator for a quick breakfast. Just heat in the microwave on low power for about a minute and you will be out the door and on with your day in no time at all.

Swimsuit season is months away. Why not enjoy The Perfect Breakfast Sandwich today. Add a glass of orange juice and all your food groups are covered.


The Perfect Breakfast Sandwich

makes 1 sandwich

1 English muffin, split
butter
1 large egg
2 slices American cheese
2 slices honey ham

Heat a small skillet to medium and add a pat of butter. Spray the inside of a 3 inch round biscuit cutter and place in the skillet. Crack egg into the biscuit cutter and cook the egg until the outside of the yolk is cooked just through.


Loosen the egg from the edge of the cutter with a small knife and remove the cutter from the pan. Flip the egg and cook for an additional 2 - 3 minutes. You want the yolk of the egg just cooked through.


Remove to a plate and cover to keep warm. Add the ham to the pan and cook to just heat through.

Meanwhile, toast the English muffin and butter both sides. Immediately top each side with a slice of American cheese. Place the ham on the bottom half of the muffin and top with the cooked egg. Place the remaining half of the muffin on top of the egg.

Breakfast is served.

Print recipe

Share/Bookmark


Grilled Hoisin Chicken Wraps with Sesame Noodles


Can you cook meals for at least seven days with what you have on hand?

That was a challenge wagered by my personal chef friend Tami aka the Dine-In Diva. For her Cook With What You've Got Challenge, one trip to the grocery store to get fresh vegetables and dairy is allowed. Then for at least a week, cook with what's in your pantry and freezer.

I'm in!!

My pantry and cupboards are stocked to the brim with pastas of all shapes, rices and beans, canned tomatoes, artichokes, and fiery peppers, and enough spices and seasonings to rival the McCormick spice factory. My refrigerator and freezer are burgeoning with more cheeses than Wisconsin, dozens of eggs, yogurts and sour cream, sauces and dressings, a few bottles of wine (always good for getting those creative juices flowing) and frozen tilapia, chicken and flank steak. Plentiful leftovers already on hand include chili with kidney beans, split pea soup with ham, and maple Dijon glazed pork tenderloin.

The first night of the challenge, I prepared a dinner that I was to make over the weekend. Scheduling conflicts on Saturday night prevented me from making this dinner as planned (i.e. we went out to our local corner bar instead). This resulted in Monday night's dinner of Brown Sugar Flank Steak with Creamed Spinach. I added some Mashed Cauliflower from a couple heads that were in the garage refrigerator.

Day One of the Challenge complete.

On Tuesday I did not cook. I reheated. All the leftovers I had one hand along with the addition of Monday night's dinner were what was served for Tuesday night's dinner.

Day Two of the Challenge complete.

One Wednesday I could have pulled out some more leftovers, but that would have been lame. Three chicken breasts, hoisin sauce, honey and soy sauce became the filling for Grilled Hoisin Chicken Wraps. I added a side of Sesame Noodles and dinner was served.

The wraps included a hoisin mayonnaise, baby spinach, and sliced mango as well as the chicken. My Oldest and I particularly enjoyed the fresh tasting, Asian-inspired wraps. No Thank You Boy and My Middle One think fruit and meat have no busy being served together. They decided on bowls of Sesame Noodles with diced pieces of the Grilled Hoisin Chicken. To each his own.

Day Three of the Challenge complete.

Now on to invent tonight's dinner. The suspense is killing me.


Grilled Hoisin Chicken Wraps

makes 4 wrap sandwiches

olive oil
3 chicken breasts, boneless and skinless
salt
pepper
1/3 cup plus 2 tablespoons hoisin sauce
2 tablespoons honey
2 tablespoons soy sauce
1/3 cup mayonnaise
4 large tortillas or wraps
1 mango, sliced
4 handfuls of baby spinach

Preheat oven to 375 degrees.

Heat a grill pan to medium high and drizzle with a small amount of olive oil. Season chicken with salt and pepper and grill for about 2 - 3 minutes per side or until the chicken just gets some nice grill marks. Remove chicken to a shallow baking dish.

Meanwhile, combine 1/3 cup hoisin sauce, honey, and soy sauce. Brush the chicken with the hoisin mixture and bake in the oven for about 12 - 15 or until the chicken is cooked through and the internal temperature is about 165 degrees. Remove chicken from the oven and place it on a cutting board. Cover with foil and let rest 5 minutes. Then slice in long strips.

* Note - the chicken can also be grilled on an outdoor grill and brushed with the hoisin mixture during the last few minutes of cooking. Because of the cold temperatures - and I am a wimp - I decided to go with the indoor grilling method outlined above.

In a small bowl, combine the remaining 2 tablespoons of hoisin sauce and mayonnaise. Set aside.

To assemble the wraps, place a tortilla on a cutting board. Spread the bottom half of the tortilla with a generous tablespoon or so of the hoisin mayonnaise. Lay a handful of the spinach over the bottom half of the tortilla. On the bottom third of the tortilla, layer a few slices of the chicken and a few slices of the mango. To roll up the wrap, fold in the two outside edges and begin rolling from the edge closest to you. When the wrap is rolled up, slice in a diagonal in the middle and serve with extra hoisin mayonnaise.


Sesame Noodles

serves 4

8 ounces of fettuccine, cooked according to the package and drained
1 teaspoon canola oil
1 teaspoon sesame oil
1 tablespoon garlic, chopped
1 tablespoon fresh ginger root, chopped
1 tablespoon hoisin sauce
1 tablespoon soy sauce
1/2 cup chicken broth
3 scallions, thinly sliced
sesame seeds

In a large saucepan, heat the canola and sesame oils. Add the garlic and ginger root and saute for 1 - 2 minutes, stirring occasionally. Add the hoisin sauce, soy sauce and chicken broth. Bring to a boil and cook for 3 - 4 minutes or until the sauce slightly thickens. Add the cooked noodles and scallions and toss to combine.

To serve, sprinkle noodles with sesame seeds.

Share/Bookmark

Grilled Balsamic Vegetable and Brie Sandwiches


Grilling vegetables is usually something I save for the summertime. With bushel upon bushel of fresh vegetables available at my local farmers' market and the ease of grilling in the summer months, it is a no-brainer when dinner time rolls around.

With temperatures hovering around 15 degrees, I enlisted my grill pan instead of my grill for dinner a couple nights ago. I made a trip to my favorite market that I previously posted about and picked up a shopping cart full of Japanese eggplants, zucchini, sweet peppers, vadalia onions, portebello mushrooms, fresh rolls, and brie cheese with plans to make Grilled Balsamic Vegetable and Brie Sandwiches. This sandwich was a popular item at the gourmet cafe where I used to work. I occasionally like to prepare some recipes from my days in the cafe's kitchen.

With a hot grill pan and a sturdy pair of tongs, I grilled up a tray of vegetables for our sandwiches. I also made a thick balsamic vinaigrette to accent the grilled vegetables flavor.
We are trying to add a vegetarian meal a week to our menu plan. The Grilled Balsamic Vegetable and Brie Sandwiches were packed with flavor and so satisfying that we did not even miss our usual chicken, beef or fish with our dinner.

Grill up a garden of vegetables to enjoy during the week. It will be a time saver and a nutritious addition to your diet.

Grilled Balsamic Vegetable and Brie Sandwiches

makes 4 sandwiches

3 Japanese eggplants or 1 eggplant, sliced thin lengthwise
2 medium zucchini, sliced thin lengthwise
3 portebello mushrooms
1 large vadalia onion, sliced in thin rings
2 yellow, orange or red peppers, cut in thin pieces
1/4 cup balsamic vinegar
1 teaspoon Dijon mustard
1 teaspoon honey
3/4 teaspoon salt
1/2 teaspoon pepper
2/3 cup olive oil
4 large sandwich rolls, sliced
about 12 - 16 slices of brie cheese

Preheat oven to 425 degrees.

Heat a grill pan to medium high heat. Toss vegetables in olive oil and sprinkle with salt and pepper. Grill in batches until slightly charred and tender, turning once. Remove from pan and place on a tray. Slice the mushrooms in large pieces.

Meanwhile, in a small bowl combine balsamic vinegar, mustard, honey, salt, and pepper. Whisk in olive oil until vinaigrette is well combined.

To assemble sandwiches, place the bottom half of the rolls on a large baking tray and brush with the balsamic vinaigrette. Top with an assortment of the vegetables. Place the top half on the rolls on the baking tray, brush with the balsamic vinaigrette, and place 3 - 4 slices of the brie cheese on top. Place baking sheet in oven to crisp the rolls and melt the cheese. Remove the baking sheet from the oven and put the 2 halves of the sandwiches together. Cut each sandwich in half.

Dinner #1 of the 12 Dinners of Christmas -- Barbecued Turkey Sandwiches


You have had just about all the turkey you can eat. But wait. One more recipe to use up the last of the turkey in your refrigerator.

Pulled Pork is a favorite dinner at our house. I decided to make a version of Pulled Pork using our leftover Thanksgiving turkey that we cooked on the Weber grill. Barbecued Turkey Sandwiches are quick to make and appeal to everyone in our family.

I paired the sandwiches with a Fennel, Celery and Apple Slaw instead of the traditional cole slaw I make to serve with Pulled Pork. The super crunch of the celery and fennel make a nice contrast to the soft roll and sweet and spicy turkey.

You may be making another turkey soon so you can use the leftovers for Barbecued Turkey Sandwiches.


Barbecued Turkey Sandwiches

Serves 4

4 cups of cooked and shredded turkey
3/4 cup of your favorite barbecue sauce - I use Sweet Baby Ray's
4 soft sandwich rolls, sliced

for the Fennel, Celery, and Apple Slaw

1 fennel bulb, sliced thin
1 medium apple, sliced thin
2 celery stalks, sliced thin
2 tablespoons lemon juice
1/4 cup olive oil
big pinch of salt
big pinch of pepper

Combine turkey and barbecue sauce in a small saucepan over medium heat. Cook until heated through, about 3 to 5 minutes.

To make the slaw, in a large bowl, combine fennel, apple, and celery. In a small bowl, whisk lemon juice, olive oil, salt, and pepper. Toss dressing with the fennel mixture.

To make the sandwiches, divide the barbecued turkey among the rolls and top with a heaping scoop of the slaw. Place top bun on slaw and enjoy!

Print recipe

Print shopping list


New Jersey Steak Sandwich


When I was a recent college graduate (only about 20 years ago), my first "real" job was as a commercial real estate appraiser in downtown Chicago. I was single, commuting into the city on the train, wearing sneakers with my stodgy business suits, and carrying a briefcase with not much more than a folder, pen and a few business cards in it. My daily lunch group consisted of similar college grads in similar business attire who's main noontime topic consisted of where we were going to happy hour after work. One of our frequent lunch destinations was to a Chicago dining institution - Al's Italian Beef. The only item I would order was a hoagie roll dipped in au jus and loaded with italian beef and peppers. With a side of fries and a Coke, I could feel my cholesterol rising at the young age of 22.

Being at a different point in my life (18 years of marriage, 3 kids, and far from the world of real estate appraisal) and living in another city (actually a small, northern New Jersey town), I get the occasional craving for an italian beef sandwich. I came up with the New Jersey Steak Sandwich to remind me of lunching with my co-workers while working in the Big City.

I streamlined the process of making the sandwiches by grilling up two marinated london broils earlier in the week. One was for dinner that night, and the other was wrapped in foil, placed in a resealable bag, and stored in the refrigerator until later in the week. That way when dinner time rolled around on Friday, all I had to do was saute some onions, make a simple cheddar cheese sauce, and assemble the sandwiches.

I served the sandwiches with slices of watermelon and kettle chips. No Thank You boy opted out of the cheese sauce (crazy kid), and My Oldest and My Middle One decided to top from plain pasta from the refrigerator with the cheese sauce to make their own mac and cheese to go along with the steak. I still have enough left for a few more sandwiches for lunch the next couple days. The Husband is going to be a happy man.

New Jersey Steak Sandwich

for the marinated steak -
1 london broil - about 1 1/2 to 2 pounds
4 garlic cloves, mashed
2 teaspoons salt
1 teaspoon pepper
2 teaspoons dried oregano
1 teaspoon dried thyme
1 teaspoon onion powder
2 tablespoons hot sauce
3/4 cup olive oil
1/4 cup red wine vinegar

In a small bowl, combine all ingredients for the marinade. Place the london broil in a resealable bag and add the marinade. Marinate for about 4 hours. Prepare a barbecue and grill the london broil over a hot fire for about 8 minutes per side for more on the rare side. Remove from grill, let cool and then wrap in foil, place in a resealable bag and stash it in the refrigerator.

for the sandwiches --
4 tablespoons butter
1 large Vadalia onion, sliced thin
2 tablespoons Worcestershire sauce
1 teaspoon pepper
1 cup beef stock


Heat a large saute pan to medium high and add butter. When it begins to foam, add the sliced onions and saute for 15 - 20 minutes or until softened and browned. Add Worcestershire sauce, pepper, and beef broth and bring to a boil. Cook for 2 - 3 minutes then reduce the heat to low to just keep mixture warm.

for the cheese sauce --
2 cups milk
3 tablespoons cornstarch
2 cups grated sharp cheddar cheese
1 teaspoon ground mustard
1/2 teaspoon salt

In a small saucepan, stir the milk and cornstarch until the cornstarch dissolves. Heat the mixture over medium high heat until it begins a gentle boil, stirring occasionally. Cook for about 3 - 4 minutes or until mixture thickens and coats a spoon. Stir in the cheese, mustard and salt until the cheese melts and the sauce is combined. Set aside.

To assemble the sandwiches --
1 cooked london broil
1 batch of sauteed and seasoned onions
1 batch cheddar cheese sauce
6 long rolls

Remove the london broil from the refrigerator and slice into bite sized pieces.

Add the meat to the onion mixture and just heat through. Slice the rolls and top with a generous portion of the meat and onions and a large dollop of the cheese sauce. Replace the top of the roll and smash down a little. Serve with plenty of napkins.

Grilled Steak Gyros with Fresh Tomato Basil Salsa and Cucumber Sour Cream Sauce


Some foods are best when purchased from a local joint on a street corner. Philly Cheesesteaks. Chili dogs. Thin crust pizza. Cheese fries. The other day I saw one of those faded posters of a gyros as I was driving by an old restaurant. Can I make a gyros as tasty and tempting as that rundown-looking place? The challenge was on!

A gyros is pita sandwich with meat (typically pork, lamb, beef, chicken, or a combinations of meats) and tomatoes, onions, and tzatziki - a yogurt and cucumber sauce. Having grown up in Chicago, gyros were available on lots of street corners. I remember the huge skewers of lamb hanging in the windows of many a restaurants.

I like gyros because by eating one, you are covering many of the basic food groups in the Food Pyramid in a single sandwich. Meat category (beef) - check. Grain category (pita) - check. Fruit and vegetables category (tomatoes, onions, and cucumbers) - check. Dairy category (sour cream) - check. This new Food Pyramid looks different than the one I knew from 30 years ago in elementary school. What the heck?! It includes categories for Physical Activity and Discretionary Calories i.e. junk food. That is not the Food Pyramid of the 1970s. I think the gyros does a pretty good job covering the foods I need to eat relatively healthy.

My gyros dinner fit well with our evening. It was a pretty typical night at our house. Lacrosse practice at 6 p.m. Softball game at 6 p.m. When does dinner fit into that schedule? I marinated the steak earlier in the day and grilled it up right before we left for our evening’s events. Covered it with foil and headed out the door. When we got home a couple hours later, I sliced up the steak super thin, gently heated it on low power in the microwave and piled it into a pita with a fresh tomato basil salsa and cucumber sour cream sauce.


The reviews came rolling in. We all enjoyed the steak even if we had it different ways. The meal lends itself to our varying tastes. A couple kids - No Thank You Boy and My Middle One - ate just the steak with a side of fresh salsa and tortilla chips. The Husband spiced it up with a little Tabasco. My Oldest and I ate ours as traditional gyros. "Very flavorful meat. I can't wait for the leftovers tomorrow," commented The Husband. "More steak for me," said No Thank You Boy.

Full stomachs = Happy family.

Grilled Steak Gyros with Fresh Tomato Basil Salsa and Cucumber Sour Cream Sauce

serves 5 with leftovers

5 pitas
1 sirloin steak, about 2 pounds
1 large vadalia onion, chopped, about 2 cups
4 garlic cloves
juice of 1 lemon
1 teaspoon thyme
1 teaspoon cumin
2 teaspoons oregano
2 teaspoons sugar
2 teaspoons pepper
2 teaspoons salt


Cucumber sour cream sauce
1 cup sour cream
1 kirby cucumber, diced
1 tablespoon lemon juice
dash of salt
dash of pepper


Fresh tomato basil salsa
about 2 pounds of fresh tomatoes, chopped
2 kirby cucumbers, diced
1/4 small red onion, diced
8 – 10 fresh basil leaves, chopped
drizzle of olive oil
dash of salt
dash of pepper


For the marinade, combine the onion, garlic, lemon juice, thyme, cumin, oregano, sugar, pepper, and salt in a food processor. Pulse until onion is finely diced and all ingredients are mixed well. Place steak in a large resealable bag and add marinade. Refrigerate for up to 12 hours; about 4 hours would be good.

For the cucumber sour cream sauce, combine the sour cream, cucumber, lemon juice, salt and pepper. Set aside.

For the fresh tomato salsa, combine the tomatoes, cucumbers, red onion, basil, olive oil, salt, and pepper. Set aside.

Heat a grill to high. Remove the steak from the marinade and grill for about 6 – 7 minutes per side or until medium rare. Remove from grill, cover with foil, and let rest for about 10 minutes. After resting period, slice steak very thinly.

For each gyros, pile a pita with the sliced steak, tomato basil salsa, and cucumber sour cream sauce. Serve with plenty of napkins.

Barbecue Pulled Chicken Sandwiches with Lemony Garbanzo Edamame Salad


Is it almost summer?!#%*&!!!

Getting tried of all the damp, cold weather lately so I enticed my family with a summer menu. Even if it is 35 degrees outside with snow flurries, we can pretend warm weather is right around the corner. Maybe in another 2, 3, 4, or 6 weeks if we are lucky.

Barbecue Pulled Chicken Sandwiches were the main attraction. I paired the sandwiches with a fruit salad for the less adventurous in the group and a Lemony Garbanzo Edamame Salad for those of use wanting more fiber in our diet.

The sandwiches were enjoyed by the whole family. Shredded chicken in a sweet and slightly spicy sauce was sandwiched between not so healthy soft, white rolls. The kids opted out of the Garbanzo and Edamame Salad. Ok with The Husband and I. It left more for us, and we felt we were being really nutritious eating it.

I think I just saw a robin fly by my window. Sunny, warm days must be on their way.

Barbecue Pulled Chicken Sandwiches
makes enough for about 6 sandwiches

2 tablespoons olive oil
2 cups onions, chopped
3 garlic cloves, chopped
1 4-ounce can green chilis, chopped
2 teaspoons cumin
1 teaspoon coriander
1/4 teaspoon red pepper flakes
1/4 cup apple cider vinegar
1 and 1/4 cups chicken broth, low sodium
2 tablespoons brown sugar
1 12-ounce bottle chili sauce
1 teaspoon salt
1/2 teaspoon pepper
4 chicken breasts, cooked and shredded (Rub with olive oil and sprinkle with salt and pepper. Bake in a 375 degree oven for 30 - 40 minutes)
6 soft, white rolls

Heat a large saucepan to medium high. Add the olive oil and onions and saute for about 8 - 10 minutes. Add the garlic and saute for another minute. Add the green chilis, cumin, coriander, and red pepper flakes and cook for about 2 minutes. Stir in the vinegar and cook for about 1 minute. Add the chicken broth, brown sugar, and chili sauce and stir to combine. Add the cooked and shredded chicken and simmer for about 30 minutes. The sauce will get nice and thick.

Serve on rolls. If there are any leftovers, serve on top of a bed of lettuce for lunch the next day,


Lemony Garbanzo and Edamame Salad

1 cup shelled edamame
1 15-ounce can garbanzo beans, drained
1 small zucchini, sliced thin
1/4 cup vadalia onion, sliced thin
1/4 cup Parmesan cheese, grated
juice of 1 lemon, about 3 tablespoons
4 tablespoons olive oil
1/4 teaspoon red pepper flakes
salt, to taste
pepper, to taste
mixed greens, for serving

Place all ingredients in a bowl and toss to combine. Serve cold or at room temperature.

Wilted Greens and Goat Cheese Sandwiches and Potato Skins


When The Husband travels, I typically don't make "Dinner." I don't know why I feel the need to make "Dinner" when he is home. It is not that he expects a gourmet, 4 course meal with candelabras and soft music (yeah right!). Tonight was sandwich and potato skins for the kids and I.

I picked up a new cookbook. Actually, Amazon delivered it to my door yesterday. A Great American Cook: Recipes from the Home Kitchen of One of Our Most Influential Chefs is a cookbook that my personal chef friends and I chose to "cook through." We are going to make as many of the recipes as we can and compare notes, tips, and photos.

I chose to make a version of Wilted Greens and Goat Cheese Sandwiches. I have a hard time making a recipe just as it is written; I use recipes more as a guide. When I adapt a recipe, it can usually lead to problems. Not that the result will be a failure. I typically never write down how I make a recipe so my family never sees it again. Hopefully my blogging will help remedy that.

The sandwiches were amazing. I was so enamored with them that I poured my wine into my daughter's glass. We had a good laugh about that. I also used the goat cheese mixture to stuff some of our potato skins. I can see this recipe as being a base for many more of my future cooking esccapades.

The notes to the recipe in the cookbook state, "Fresh goat cheese, minced onions, and cooked greens make for a quick and sophisticated sandwich." I felt really sophisticated eating my sandwich as my kids wrestled in the kitchen and the dog licked the dishes in the dishwasher.

Use this recipe as your starting point and create something magical.

Wilted Greens and Goat Cheese Sandwiches

adapted from A Great American Cook by Jonathan Waxman

1 tablespoon olive oil
1/2 cup thinly sliced onions
2 large mushrooms, chopped fine
2 garlic cloves, chopped
1 cup mixed greens finely chopped (I used the organic mixed greens from Costco)
1/4 pound goat cheese
butter
4 slices from a baguette
cooked, empty potato skins
cooked, crumbled bacon

Heat a saute pan to medium high. Add the olive oil, onions, and mushrooms. Cook for about 5 - 8 minutes. Add garlic and cook and additional minute. Add the greens and quickly wilt.

In a small bowl, combine onion mixture and goat cheese. Season with salt and pepper.

Heat a small saute pan and add a pat of butter. Spread about 2 tablespoons of the cheese mixture on 2 slices of the bread. Top each with another slice of bread. Cook sandwich until browned on each side.

For potato skins, preheat oven to broil. Fill each skin with a heaping tablespoon of the cheese mixture and top with crumbled bacon. Broil until cheese melts, about 3 - 5 minutes.


Mini Macs

Mini Mac

When my kids were preschool age, our family relocated from the Midwest to Southern California. Quite a change in lifestyle for us. The Husband took a new job and worked obscenely long hours and had frequent out-of-town trips. Feeling like a fish out of water and lacking in adult comradery, the kids and I spent our 4 years basking in the Sunshine State, exploring the beaches, theme parks and mountains, and every once in a while, the McDonald's Playland.

During The Husband's work induced absences, our diversions included the local fast food establishments around our home. While my kids lost themselves in the ball pit and the endless maze of tubes and slides, I would treat myself to the occasional Big Mac. A favorite of mine as a child and still to this day. As I have passed my 20s, 30s, and enjoy my 40s, the whopping 560 calories, 31 grams of fat, and 1070 milligrams of sodium, are hardly a girl's best friend.

A craving for a Big Mac still comes over me every so often. I created a healthier, mini version of the beloved McDonald's burger to satisfy my fast food desire. No Thank You Boy was the Grillmaster and assited in the flipping of the burgers. Our indoor grill was a suitable stand-in as grilling outdoors in February in New Jersey is not an enjoyable endeavor. The burgers came together quickly with a total prep and cooking time of about 20 minutes. With a side of oven roasted fries, I can avoid the drive-thru for another day.

Mini Macs

makes 10 Mini Macs

1 pound ground beef, I used 90/10
1/2 teaspoon salt
1/2 teaspoon pepper
1000 Island dressing
shredded lettuce
dill pickle chips
diced onions
American cheese
10 small buns, such as Martin's Famous Party Potato Rolls

In a small bowl, mix the ground sirloin with a little salt and pepper. Form into about 10 mini burger patties. Make sure they are really thin. On a preheated grill pan or skillet, cook the burgers for about 2 minutes per side. After the burgers are flipped the first time, top with a slice of cheese. Remove and set aside.

Slice the bun in 2 pieces and then slice an extra layer of the bun off the top piece. Each burger will have a top bun, middle bun and bottom bun. For each Mini Mac, place the bottom bun on a plate. Top with 1 burger, a squirt of 1000 island dressing, diced onions, shredded lettuce, the middle bun, another burger, more 1000 island dressing, diced onions, 2 pickle chips, more shredded lettuce and the top bun.

Another fast food craving averted.