Showing posts with label Everything on the Side. Show all posts

Carrot Ginger Dressing

Carrot Ginger Dressing
A night out at your local Japanese restaurant will undoubtedly include a salad with crispy iceberg lettuce, shredded carrots, tomato wedges, and cucumber slices topped with a large dollop of Carrot Ginger Dressing.  This zippy dressing tastes like no other with its bite from the ginger root, saltiness of the miso, and bright orange color and fresh taste from the carrots.  It is packed with flavor and is light and refreshing.

I have been making more and more salad dressings recently as the long list of ingredients on the store bought brands scares me.  I am not sure what Polysorbate 60 is and I definitely don't need Yellow #5 food coloring in my salad dressing.  Most homemade dressings contain only a few ingredients that the well stocked kitchen typically has on hand.  And many are combined in a mason jar or whirled in the blender or food processor which makes prep a breeze.

Carrot Ginger Dressing took all of 5 minutes to make in my food processor and that included the assembling and putting away the ingredients.  The recipe makes about 1 cup of dressing allowing enough for a few salads during the week.

Once you taste your homemade Carrot Ginger Dressing you will want to make all your salad dressings from scratch.  This could be the start of something beautiful.


Carrot Ginger Dressing

makes 1 cup

1 tablespoon grapeseed or peanut oil (or substitute a neutral tasting oil you have on hand)
2 teaspoons sesame oil
1/4 cup rice vinegar
1 tablespoon honey
3 tablespoons white miso*
1 inch piece of fresh ginger root, peeled and chopped
4 carrots, peeled and cut in large chunks
3 tablespoons water

Combine the ingredients in the bowl of a food processor and pulse until well combined but still with small bits of carrot.

Dressing can be kept in a covered container in the refrigerator for up to 1 week.

*Miso is available in most well-stocked grocery stores.  It keeps in the refrigerator for several months or in the freezer indefinately.

Grilled Steak with Mango Watermelon Relish

Grilled Steak with Mango Watermelon Relish
After a busy Memorial Day weekend loaded with eating and drinking and parties, I was on the hunt for an easy dinner for Monday evening.  I don't like to shop at the last minute for dinner so I hit the grocery store early on Friday morning so I wouldn't be fighting the crowds loading up on hotdogs, hamburgers, potato salad, and red, white and blue sprinkled sugar cookies on Saturday and Sunday.  I filled my refrigerator with chicken, ground beef, and steaks and a variety of fruits and vegetables ensuring that I would have the ingredients needed to come up with with meals throughout the weekend.

A few items I picked up at my newly renovated Shoprite were flank steak, a whole watermelon, a couple mangoes, asparagus, and a half dozen ears of corn.  The sweet and savory food combinations are a favorite of mine so I set about developing a recipe to use the meats and fruits and vegetables I had on hand and which was easy to throw together.

Grilled Steak with Mango Watermelon Relish is a marriage of a slightly salty and savory grilled steak and a cool, sweet relish with a bite from diced red onion.  My family is not a fan of what they call "sweet meat" (meats combined with fruit) so I was the only one who enjoyed the steak with the fruit relish.  No worries as many of my dinners can be suited to the tastes of the diners.  Since my family opted out of the mango relish, they were able to have the grilled steak which benefited from the soy sauce and bourbon marinade.  With sides of steamed asparagus, corn on the cob, and some pasta salad leftover from a party on Sunday, dinner was a success.

If you are on the lookout for a new way to serve a grilled steak, give Grilled Steak with Mango Watermelon Relish a try.

Grilled Steak with Mango Watermelon Relish

serves 4

for marinade --

1/4 cup soy sauce
2 tablespoons bourbon
1 tablespoon Worcestershire sauce
juice of 1 lime
2 tablespoons brown sugar
2 garlic cloves, chopped

1 flank steak, about 1 3/4 pounds

for relish --

1 mango, diced
1/4 cup cucumber, diced
1/2 cup watermelon, diced
2 tablespoons red onion, diced

In a large resealable bag, combine the soy sauce, bourbon, Worcestershire sauce, lime juice, brown sugar, and garlic.  Add the steak, seal bag and marinate for 30 minutes at room temperature or 2 - 4 hours in the refrigerator.

Meanwhile, combine the mango, cucumber, watermelon and red onion in a small bowl.  Set aside.

Heat grill to medium high heat.  Grill the steak for 3 - 5 minutes per side.  Do not overcook the steak or it will be tough.  Flank steak is best served medium rare.  Remove from grill and allow to rest for 5 minutes.  Slice thinly against the grain and serve topped with the relish.

Grilled Old Bay Shrimp


A week of sun, sand and surf at the Jersey Shore is our summer vacation. We spend our time reading trashy magazines on the beach, floating on tubes in the ocean, digging super deep holes in the sand, concocting new drinks for happy hour, and discussing what we will have for dinner while we are still eating breakfast. Each night, a different group takes on dinner detail. It could be a couple, a bunch of kids, or Grandma and Grandpa who plan, cook, serve, and clean up our nightly feast.

When The Husband and I took our turn preparing dinner, we decided on a typical beach meal that we knew everyone would love. We dined on a couple appetizers of Garlic Clams on the Grill


and Grilled Old Bay Shrimp


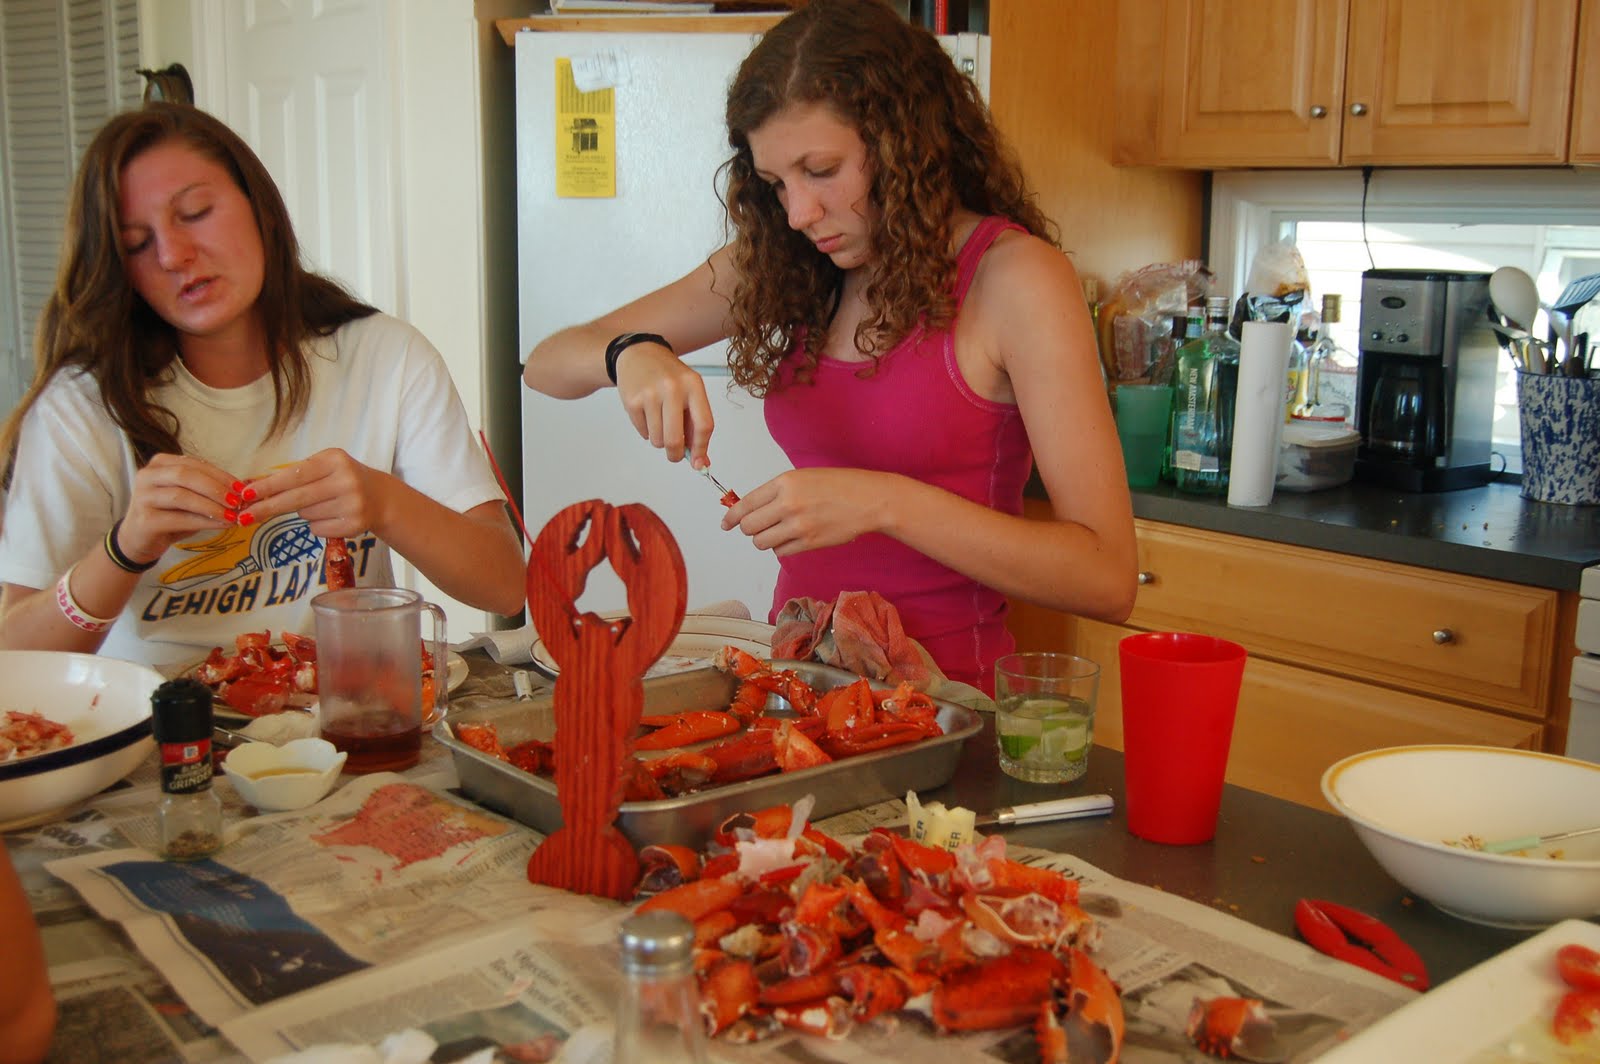
followed by 15 pounds of steamed lobster claws,


Sweet and Tangy Slaw


a huge caprese salad of fresh mozzarella, Jersey tomatoes, and basil drizzled with olive oil and balsamic vinegar, and crusty loaves of Italian bread.


The shrimp appetizer was the first to be served


and was gobbled up in no time.


After a request from Grandma for the recipe and the speed at which the shrimp disappeared, I decided that the incredibly easy recipe was a keeper.

The clams were devoured just as quickly with The Husband practically drinking the garlic infused wine sauce they were cooked in.

Next up were two huge pans of steamed lobster claws that we picked up earlier in the day from Point Lobster Company in Point Pleasant, New Jersey. This is the best way to have a lobster feast because the claws are all meat and by enlisting a couple family members as the crackers of the claws, retrieving the meat from the shells is a breeze.


The leftover lobster meat is removed from the shells by a couple more diners


and becomes tomorrow's lunch of Lobster Rolls.

Taking on the role of supervisor in the kitchen, I make sure that dinner runs smoothly. And with the help of many family members and a few cocktails, it always does.


Happy Summer!

Grilled Old Bay Shrimp
1/2 stick of butter melted and cooled
4 cloves of garlic chopped
1 1/2 teaspoons Old Bay Seasoning
2 pounds of large shrimp (21 - 25 per pound) peeled with tails on and deveined
about 24 (12 inch) wooden skewers, soaked in water for 10 minutes
spicy cocktail - there are many tasty store brands to choose from

In a small bowl, combine the butter, garlic and Old Bay Seasoning. Place shrimp in a large resealable bag and add the butter mixture. Squish around the contents of the bag so that all the shrimp are well coated with the marinade. Seal the bag and let the shrimp marinate for about 30 minutes in the refrigerator.

Meanwhile, prepare a hot grill and skewer the shrimp. To skewer the shrimp, lay 2 skewers parallel with each other and thread the top portion of about 5 shrimp onto each pair. By threading the shrimp on two skewers, it is easier to grill them as the shrimp does not spin around when being turned over on the grill.


Grill the shrimp for about 3 - 4 minutes per side. Be careful not to overcook the shrimp as they will be tough. Remove the skewers from the grill and take the shrimp off the skewers and place on a large serving dish. Serve with cocktail sauce if desired.

Print recipe

A special thanks to my nephew Will for being my photographer for the evening.


The Crab Cake


As a God-fearing, church-going Catholic, I follow the Lenten regulations of abstaining from meat on Fridays mainly because I want to improve my chances of making it to Heaven. It is only these Fridays during Lent that I crave a huge, juicy cheeseburger because I am "not supposed" to eat meat on these days.

As a backup to my burger desire, I keep a can of fresh crab meat on hand to make The Crab Cake instead. A mostly crab meat filled patty with barely enough egg and panko to bind it together reminds of warm summer days spent at The Shore instead of the burger of my dreams.

Crab cakes are a weekly request from my clients. I think I will put in a request to make them for myself this Friday.

The Crab Cake

Use crab meat from the refrigerated section near the seafood department of your local grocery store or Costco. I use Phillip's backfin or special varieties.

makes 12 crab cakes or about 4 servings

1/3 cup diced onion
1/3 cup diced celery
2 teaspoons Worcestershire sauce
1/2 teaspoon garlic powder
1 teaspoon Old Bay seasoning
1/4 teaspoon dry mustard
2 tablespoons chopped fresh parsley
1 egg
1 pound of fresh crab meat, either backfin or special varieties
1/4 cup mayonnaise
1/2 cup panko plus more for dredging crab cakes in before sauteing
canola oil and butter for frying

for classic tartar sauce --
1 cup mayonnaise
2 tablespoons sweet pickle relish
squeeze of lemon juice

shredded iceberg lettuce

In a large saute pan, heat about a tablespoon of canola oil and saute the onion and celery for 4 - 5 minutes. Remove from pan and allow to cool.

Meanwhile, in a large bowl, gently combine the Worcestershire sauce, garlic powder, Old Bay seasoning, dry mustard, parsley, egg, crab meat, 1/4 cup of mayonnaise, and 1/2 cup of panko and the onion-celery mixture. Make sure that you do not mix too much because you do not want to break up the crab pieces.

Using a 1/4 cup measure, form the crab mixture into 12 crab cakes. If you have time, refrigerate, covered for 30 minutes to help the crab cakes hold their shape while sauteing.

Heat a large saute pan to medium high. Drizzle about 1 - 2 tablespoons of oil and add 1/2 tablespoon of butter into pan. Place about 1 cup of panko in a shallow dish. Dredge each side of the crab cakes in the panko and saute for about 3 - 4 minutes per side or until golden brown. Remove from pan and drain on paper towels.

For the tartar sauce, in a small bowl combine the 1 cup of mayonnaise, pickle relish and lemon juice.

Serve crab cakes on top of shredded iceberg lettuce with a squeeze of lemon and classic tartar sauce.


Grilled Hoisin Chicken Wraps with Sesame Noodles


Can you cook meals for at least seven days with what you have on hand?

That was a challenge wagered by my personal chef friend Tami aka the Dine-In Diva. For her Cook With What You've Got Challenge, one trip to the grocery store to get fresh vegetables and dairy is allowed. Then for at least a week, cook with what's in your pantry and freezer.

I'm in!!

My pantry and cupboards are stocked to the brim with pastas of all shapes, rices and beans, canned tomatoes, artichokes, and fiery peppers, and enough spices and seasonings to rival the McCormick spice factory. My refrigerator and freezer are burgeoning with more cheeses than Wisconsin, dozens of eggs, yogurts and sour cream, sauces and dressings, a few bottles of wine (always good for getting those creative juices flowing) and frozen tilapia, chicken and flank steak. Plentiful leftovers already on hand include chili with kidney beans, split pea soup with ham, and maple Dijon glazed pork tenderloin.

The first night of the challenge, I prepared a dinner that I was to make over the weekend. Scheduling conflicts on Saturday night prevented me from making this dinner as planned (i.e. we went out to our local corner bar instead). This resulted in Monday night's dinner of Brown Sugar Flank Steak with Creamed Spinach. I added some Mashed Cauliflower from a couple heads that were in the garage refrigerator.

Day One of the Challenge complete.

On Tuesday I did not cook. I reheated. All the leftovers I had one hand along with the addition of Monday night's dinner were what was served for Tuesday night's dinner.

Day Two of the Challenge complete.

One Wednesday I could have pulled out some more leftovers, but that would have been lame. Three chicken breasts, hoisin sauce, honey and soy sauce became the filling for Grilled Hoisin Chicken Wraps. I added a side of Sesame Noodles and dinner was served.

The wraps included a hoisin mayonnaise, baby spinach, and sliced mango as well as the chicken. My Oldest and I particularly enjoyed the fresh tasting, Asian-inspired wraps. No Thank You Boy and My Middle One think fruit and meat have no busy being served together. They decided on bowls of Sesame Noodles with diced pieces of the Grilled Hoisin Chicken. To each his own.

Day Three of the Challenge complete.

Now on to invent tonight's dinner. The suspense is killing me.


Grilled Hoisin Chicken Wraps

makes 4 wrap sandwiches

olive oil
3 chicken breasts, boneless and skinless
salt
pepper
1/3 cup plus 2 tablespoons hoisin sauce
2 tablespoons honey
2 tablespoons soy sauce
1/3 cup mayonnaise
4 large tortillas or wraps
1 mango, sliced
4 handfuls of baby spinach

Preheat oven to 375 degrees.

Heat a grill pan to medium high and drizzle with a small amount of olive oil. Season chicken with salt and pepper and grill for about 2 - 3 minutes per side or until the chicken just gets some nice grill marks. Remove chicken to a shallow baking dish.

Meanwhile, combine 1/3 cup hoisin sauce, honey, and soy sauce. Brush the chicken with the hoisin mixture and bake in the oven for about 12 - 15 or until the chicken is cooked through and the internal temperature is about 165 degrees. Remove chicken from the oven and place it on a cutting board. Cover with foil and let rest 5 minutes. Then slice in long strips.

* Note - the chicken can also be grilled on an outdoor grill and brushed with the hoisin mixture during the last few minutes of cooking. Because of the cold temperatures - and I am a wimp - I decided to go with the indoor grilling method outlined above.

In a small bowl, combine the remaining 2 tablespoons of hoisin sauce and mayonnaise. Set aside.

To assemble the wraps, place a tortilla on a cutting board. Spread the bottom half of the tortilla with a generous tablespoon or so of the hoisin mayonnaise. Lay a handful of the spinach over the bottom half of the tortilla. On the bottom third of the tortilla, layer a few slices of the chicken and a few slices of the mango. To roll up the wrap, fold in the two outside edges and begin rolling from the edge closest to you. When the wrap is rolled up, slice in a diagonal in the middle and serve with extra hoisin mayonnaise.


Sesame Noodles

serves 4

8 ounces of fettuccine, cooked according to the package and drained
1 teaspoon canola oil
1 teaspoon sesame oil
1 tablespoon garlic, chopped
1 tablespoon fresh ginger root, chopped
1 tablespoon hoisin sauce
1 tablespoon soy sauce
1/2 cup chicken broth
3 scallions, thinly sliced
sesame seeds

In a large saucepan, heat the canola and sesame oils. Add the garlic and ginger root and saute for 1 - 2 minutes, stirring occasionally. Add the hoisin sauce, soy sauce and chicken broth. Bring to a boil and cook for 3 - 4 minutes or until the sauce slightly thickens. Add the cooked noodles and scallions and toss to combine.

To serve, sprinkle noodles with sesame seeds.

Share/Bookmark

Maple Glazed Brussels Sprouts with Bacon


Brussels sprouts are popping up all over the produce departments of grocery stores. This cool weather-loving vegetable looks like a little head of cabbage, and I am sure many of you said, "Yuck!" when first eyeing the photo of the sprouts. They have gotten a bad rap, but really are delicious and oh so nutritious for you. Loaded with iron and a good source of vitamins A and C, folate and fiber, these little gems pack a healthy punch.

One of our family favorite recipes for Honey Mustard Brussels Sprouts was posted earlier on my blog. The sprouts are roasted and then tossed with spicy mustard and honey and have a hint of caramelized flavor. With bushels and bins of Brussels sprouts at my local market, it was time to invent another way to serve them to my family.

Maple Glazed Brussels Sprouts with Bacon is a stove top preparation with a variety of tastes and textures. The tender sauteed sprouts are enrobed in a light glaze of maple syrup and mustard and topped with crisp and salty bacon bits. I bought an extra few handfuls knowing my girls would enjoy this recipe. No Thank You Boy stared at the two lonely Brussels sprouts on his plate,took one bite, made a screwed up I-can't-believe-I-am-eating-this face and proceeded to say, "No thank you." At least he gave them a try.

These beauties will be around until there is a hard frost so enjoy fresh Brussels sprouts while you can.

Maple Glazed Brussels Sprouts with Bacon
serves 6

4 slices of bacon, chopped
olive oil
1 large sweet onion, thinly sliced
about 2 pounds Brussels sprouts, cleaned, small ones left whole and large ones halved
1/3 cup chicken broth
2 tablespoons maple syrup
2 teaspoon Dijon mustard
salt and pepper to taste

In a large saute pan over medium high heat, cook bacon until crisp. Remove bacon from pan and drain on paper towels.

Add enough olive oil to the pan along with the bacon drippings to equal about 2 tablespoons. Add onion and saute until just beginning to brown, about 8 - 10 minutes. Add the Brussels sprouts and saute for about 2 - 3 minutes. Add the broth, maple syrup, and Dijon mustard and stir to combine. Reduce the heat to medium low. Cover and cook for about an additional 8 - 10 minutes or until the Brussels sprouts are tender. Season with salt and pepper and top with the cooked bacon.

Caramelized Sweet Corn and Zucchini


Many dinners at our house include grilled steak, chicken, or roasted fish. During the bountiful summer months, fresh fruits and vegetables are overflowing at the market and make preparing side dishes a no-brainer. As the weather grows cooler and even to colder, the farmers' markets close for the season and the variety of vegetables dwindles. I am always trying to add an interesting side dish to make dinner....well....more interesting.

Steaming broccoli or roasting baby carrots are acceptable vegetable sides at our dinner table, but they don't have the "wow" factor. Dinner should be more than just eating food. Gathering with family and friends to talk about the day's events and sharing a delicious meal is what dinner should be about.

The variety of frozen vegetables in the grocery store freezer section is wide ranging. Several freezer staples such as petit peas and corn make acceptable stand-ins for their fresh counterparts. Frozen vegetables make a perfect base for a tasty side dish that takes only minutes to prepare.

Caramelized Sweet Corn and Zucchini combines frozen sweet corn (or fresh if it is available), a fresh zucchini, scallions, half and half, and a sprinkling of Parmesan cheese make for a more tasty version of creamed corn. My Oldest liked the slightly caramelized vegetables while My Middle One commented that the dish would be good mixed with pasta. A budding chef she is.

Serve some Caramelized Sweet Corn and Zucchini tonight. That lonely piece of chicken on your dinner plate won't be so lonely anymore.


Caramelized Sweet Corn and Zucchini
serves 6
2 tablespoons butter
1 (1 pound) package frozen sweet corn or 3 1/2 cups fresh corn
1 zucchini, diced
2 scallions, chopped
1/3 cup half and half
1/4 cup Parmesan cheese, grated
1/2 teaspoon salt
1/4 teaspoon pepper

Heat a large saute pan to medium high and add the butter. When it has melted, add the corn, zucchini, and scallions. Cook for 6 - 8 minutes or until the vegetables begin to brown. Add the half and half and continue to cook until the liquid reduces and thickens, about 3 - 4 minutes. Stir in the Parmesan cheese and season with the salt and pepper.

Spaghetti Squash with Parmesan and Tomatoes

Spaghetti Squash with Parmesan and Tomatoes
Many of my posts are about foods that kids will love. Sometimes I like to throw a new food into my cooking mix just to expose my kids to it. With farmers' markets over flowing with potatoes, tomatoes, peaches, blueberries, and squashes, I decided to pick up a spaghetti squash to serve with dinner. I can't promise that your little ones will devour this dish, but you may get them to try it because the name of the squash includes "spaghetti" which is a kid-approved food.

If you have been following along on my cooking adventures for the past 2 1/2 years, you will know that I am pretty much of a tough love mom/cook with my family and even friends that come to eat at our dinner table. I feel that many parents label their kids "picky eaters" and basically throw their hands up to exposing them to new foods.

"Billy only eats chicken nuggets and hot dogs."

"Sally refuses to eat anything that is green."

It is easier to serve what the kids think they like then deal with the moaning and groaning of hungry youngsters at the dinner table. If the parents only serve hotdogs and chicken nuggets, then kids will think they only like hotdogs and chicken nuggets.

Now don't get the idea that I am some tyrant and make my kids eat lima beans and liver for dinner, but we may try them one day. I do strongly recommend that everyone tries what has been prepared for dinner. I am not force feeding any kid that dines at our dinner table, but I enthusiastically suggest that they try what is for dinner. They will never know if they like a new food unless they try it. More times than not my own No Thank You Boy has tried to opt out of eating a new food. But if he didn't try roasted green beans he would have never known they are one of his favorite vegetables.

Spaghetti Squash with Parmesan and Tomatoes is a fantastic recipe for those hot summer days when you don't want to turn on the oven to cook. The squash cooks in the microwave. Enlist the kids to help with the fun part of scraping the "spaghetti" out of the squash. If you get kids to help prepare dinner, they will be proud of their accomplishment and more likely to give new foods a try.

Two of my kids love zucchini so this close squash cousin was enjoyed by them. No Thank You Boy on the other hand tried it and said, "No thank you," to future bites. That's ok. He tried it. I love the fresh garden taste of this dish and the ease of preparation. Serve Spaghetti Squash with Parmesan and Tomatoes with Java Rubbed Strip Steaks and a loaf of crusty bread and your meal will be complete.

With the bounty waiting at your local farm stands, serve a new food tonight. You will never know if you like it until you try it.


Spaghetti Squash with Parmesan and Tomatoes

1 spaghetti squash, about 3 pounds
2 - 3 tablespoons olive oil
3/4 teaspoon salt
1/2 teaspoon pepper
1/3 - 1/2 cup freshly grated Parmesan cheese, plus more for sprinkling on top
1 cup chopped tomatoes

Poke the squash with a metal skewer or sharp paring knife about 6 to 8 times. The holes will allow the steam to escape while the squash cooks. Place the squash in a glass baking dish and microwave at high power (100 percent) for about 12 - 15 minutes, or until it is soft when pressed. Let the squash sit in the microwave for about 5 to 10 additional minutes.

Remove the squash from the microwave and cut in half lengthwise. Gently scrape the "spaghetti strands" into a large bowl. Add the salt, pepper, olive oil, Parmesan cheese, and tomatoes and toss to mix. Taste and season with extra Parmesan cheese, salt and pepper if needed.

For a unique presentation, return the squash and Parmesan mixture to the halved squash shells and serve with extra Parmesan sprinkled on top.

Grilled Mexican Chicken with Tomato Avocado Salsa


After picking up a new client and interviewing another potential client, my personal cheffing schedule has been filling up. My days are little easier to schedule during the summer months because I don't need to factor in getting the kids up and off to school, but those days will be here soon enough.

Today was a cook day for one of my clients. It started out about 7 a.m. with a big cup of coffee and a few scoops of kibble for the dogs. I packed my car with my cooking supplies and was off to the grocery store by 8:15. I cruised through the aisles of the store and along the way answered a couple inquisitive people's questions about my personal chef business. They spied my handy dandy clipboard with my computerized shopping list and commented on my organizational skills. I breezed through the checkout and with my groceries neatly packed in my eco-friendly shopping bags, I was off to my clients' kitchen. For 3 and 1/2 hours I prepared brie and caramelized onion stuffed chicken with roasted root vegetables, bacon, Swiss, and mushroom mini meatloaves with honeyed baby carrots, and chicken fajitas with Spanish rice. With the meals packaged and stacked in the refrigerator and the kitchen left spotless, I was on my way home to make dinner for my family.

I have been in a cooking slump lately. Nothing seems to sound utterly fantastic to cook for dinner. Time to adopt a new philosophy - just make good food. No need to reinvent the wheel I mean the meal every night.

On the menu tonight was Grilled Mexican Chicken with Tomato Avocado Salsa. My new favorite chicken part to cook (besides drumsticks) is the chicken tender. It grills up quickly and stays moist and juicy. Just over 2 pounds of chicken was marinated in a concoction of lime juice, cumin, cilantro, paprika, garlic, onion, Worchestershire sauce, olive oil, chili powder and brown sugar. 8 - 10 minutes on a hot grill and they are done. Topped with a fresh salsa of tomatoes, avocados, kirby cucumber, onion, and cilantro, and dinner is on the table in no time. A sprinkling of cojita cheese adds a salty Mexican twist.

This menu was well received all around. My Middle One will eat the salsa with tortilla chips at every chance she gets. I needed to hid the bowl from her before dinner so she did not devour it all. The Husband served his chicken and salsa in flour tortillas and was appreciative of the leftovers available for tomorrow. The meal was very satisfying, but not so overly filling to make me need to put on elastic-waisted shorts after dinner. The combination of flavors was very fresh tasting. The chicken is not overly spicy. Add more chili powder if you like your food with some heat.

A prefect summer meal.


Grilled Mexican Chicken with Tomato Avocado Salsa
serves 6
for chicken --
1/4 cup onion, chopped
3 garlic cloves, chopped
juice of 2 limes
1/4 cup olive oil
2 tablespoons Worcestershire sauce
1/2 teaspoon chili powder
2 teaspoons cumin
2 teaspoons paprika
1 tablespoon brown sugar
3 tablespoons fresh cilantro, chopped
2 1/2 pounds chicken tenders

for salsa --
1/3 cup onion, chopped
1 cup kirby cucumber, chopped
2 1/2 cups tomato, chopped
juice of 1/2 of a lime
1 tablespoon olive oil
2 tablespoons fresh cilantro, chopped
1 avocado, chopped and tossed with juice of 1/2 of a lime
salt and pepper to taste

cojita cheese, for sprinkling
tortillas
tortilla chips

In a small bowl combine the first 10 ingredients. Place the chicken tenders in a resealable bag and add the marinade. Seal and squish around the contents to mix well. Let chicken marinate for about an hour.

Heat a grill to medium high. While the grilling is heating, prepare the salsa. In a medium sized bowl, combine the salsa ingredients. Set aside.

Remove the chicken from the marinade and and grill for about 4 - 5 minutes per side or until the chicken is cooked through. Remove from grill and top with the salsa and the cojita cheese. Serve with tortillas and tortilla chips.


Sweet and Tangy Slaw


Classic summer salads including cole slaw, potato salad, and macaroni salad are usually mayonnaise-laden side dishes. I have always loved these salads. My first experience with potato salad was at my grade school friend Susie's home. Her mom made a simple yet spectacular sour cream and mayonnaise potato salad that I requested every chance I got. Even though I enjoy elbow macaroni or shredded cabbage and carrots enrobed in creamy mayonnaise dressings, every now and then I crave a slimmed down version of these traditional American barbecue and picnic salads.

My Sweet and Tangy Slaw is a refreshing salad which is made healthier by leaving out the mayonnaise. A light vinaigrette dresses the cabbage and carrot blend which gets an extra crunch from the addition of poppy seeds. This side dish, which can be stored in the refrigerator for up to three days, makes a perfect accompaniment to grilled steaks, chicken or fish.

For your next outdoor bash, prepare a side of Sweet and Tangy Slaw. Your guests will be coming back for seconds as well as the recipe.

Sweet and Tangy Slaw
serves 4 - 5

1/4 cup canola oil
1/4 cup sugar
2 tablespoons apple cider vinegar
1 heaping teaspoon salt
1/4 teaspoon pepper
dash of hot sauce
1/2 teaspoon poppy seeds
1 (14 ounce) bag of shredded cabbage and carrots such as Dole Cole Slaw

Place first 7 ingredients in a large bowl and whisk to combine. Add cabbage and carrot slaw and toss to combine. Store covered in refrigerator for up to 3 days.

Dill Pickle Potato Salad

Dill Pickle Potato Salad
I have been cooking for over thirty years. My early cooking adventures during my preteen years included many recipes with Bisquick, hotdogs, instant pudding, and chocolate chips. My best friend growing up was Susie, and we would spend our Saturdays grilling up a package of Oscar Mayer hotdogs and whipping up a batch of double chocolate instant pudding to eat topped with Cool Whip. Oh those were the days.

Fast forward to 2005. I am working with my friend Amy in a small gourmet shop. We are the cooks, dishwashers, menu planners, waitresses, counter help, and trash taker-outers. It is our dream job. Amy has a fantastic recipe for potato salad that came from a relative of hers. We put it on the menu, and it is a hit. Every sandwich and wrap comes with a side of Dill Pickle Potato Salad. We are making batches of the salad every day. I can even make the salad in my sleep.


With the Fourth of July just around the corner, a batch of Dill Pickle Potato Salad will be perfect for your holiday celebration. No picnic is complete without it.

Dill Pickle Potato Salad
makes about 6 servings

2 pounds of small red potatoes, about 10
1 tablespoon pickle juice from the pickle jar
2 tablespoons Italian dressing. I recommend Newman's Own Italian Dressing
2 whole dill pickles, cut in large chunks
2 stalks of celery, diced
3/4 cup mayonnaise
1/4 teaspoon pepper
1/2 teaspoon salt

Fill a large pot with cold water and place on stove. Cut potatoes in large chunks and place in pot. Cook potatoes over medium high heat for about 20 - 30 minutes or until just cooked through. Drain and place in a large bowl. Add pickle juice and dressing and toss to coat. Cover bowl with a towel for 10 minutes.

Add pickles, celery, mayonnaise, pepper and salt. Toss to coat all the ingredients with the mayonnaise. Cover and refrigerate until ready to serve.

Chunky Greek Salad


Many of our weekends during May and June are spent at lacrosse or softball tournaments. These hot days include visits to a variety of "snack shacks" which typically offer a menu that is less on the healthy side and appeal more to the kid in all of us. I love a good hotdog, bag of Cheetos, and a Coke just as much as the next person. But after one too many Fruit Roll-Ups, slices of greasy pizza, and nacho chips covered in neon orange cheese, my body is craving just about any vegetable or fruit.

Packing an ice-filled cooler with sub sandwiches, cut up celery, carrots, and broccoli with hummus, wedges of chilled watermelon, single serving yogurts, snack bags of trail mix, and mini pumpkin, zucchini, and lemon poppy seed muffins makes the dining experience along the sidelines of a dusty ball field a much more enjoyable experience. I have been including a few travel-worthy salads in the cooler with the latest favorite being Chunky Greek Salad.

Some sports-filled Saturday mornings start just as the newspaper hits the driveway at 6 a.m. On these early days, I am glad that this salad is prepared in practically minutes. By combining a few crunchy peppers and cucumbers with feta, olives, and bottled vinaigrette dressing, we are out the door and off for our day's adventures.


Chunky Greek Salad

makes about 6 cups or 4 - 5 servings

1 large green pepper, cut in 1-inch dice
1 large red pepper, cut in 1-inch dice
2 kirby cucumbers, cut in large chunks
1/2 of a 15-ounce can of black olives, pitted, more if you love olives
about 1/3 pound feta cheese, crumbled in large chunks
about 3 - 4 tablespoons of Newman's Caesar Dressing or your favorite vinaigrette

In a large bowl, combine the peppers, cucumbers, olives and feta. Add vinaigrette to the ingredients and toss to coat.

Store in the refrigerator. Salad can be served chilled or at room temperature.


California Cole Slaw


You can never have enough options for side dishes. My California Cole Slaw was developed for a cookout with family and friends. Cole slaw is one of my favorite summertime salads so I used a variation on my typical dressing for this dish. A sweet and tangy dressing is tossed with baby spinach, julienned apples, thinly sliced red onions, and shredded cabbage and carrots. A sprinkling of sunflower seeds adds unexpected salty crunch.

Try it. You'll like it.

California Cole Slaw
An alternative to traditional cole slaw which includes baby spinach, apples and sunflower seeds tossed with a sweet and tangy dressing.

serves 6

for the dressing -
3 tablespoons mayonnaise
3 tablespoons plain yogurt
1 1/2 tablespoons honey
2 teaspoons Dijon mustard
1 - 2 tablespoons half and half or milk
salt and pepper to taste

8 cups of baby spinach
2 cups of shredded cole slaw mix
1 large apple, julienned
1 small red onion, thinly sliced
1/4 cup sunflower seeds

In a small bowl combine the ingredients for the dressing. Set aside.

In a large bowl, combine the spinach, cole slaw mix, apple, onion, and 3 tablespoons of the sunflower seeds. Set aside.

To serve, toss spinach mixture with the dressing. Sprinkle the remaining sunflower seeds and serve immediately.

Korean Barbecue at Home


The Husband works for a Japanese company and occasionally travels to Japan for business. He is an adventurous eater and will eat almost anything. On his last trip he ate raw chicken which is considered a delicacy in Japan.

On weekends, he loves eating the leftovers out the refrigerator. Even those containers hiding in the great depths that don't look remotely familiar to me. He has found a few dinners that look like science experiments. When I tell him that the pork tenderloin is beyond its expiration date, he replies, "I'll just scrape the green stuff off and nuke it in the microwave. The microwave will kill anything. I like to think that a little aging adds more flavor." He rarely gets sick so all that penicillin in the bacteria he is digesting must be keeping him healthy.

During his trips to Japan, The Husband's favorite type of restaurant is a Korean barbecue. I am glad that he wanted to recreate a Korean barbecue in our kitchen instead of us having to dine on raw chicken.

At Korean barbecue restaurants, marinated beef, chicken and other meats are cooked on grills built into the center of the diners' table. Served with either a spicy chile paste based dipping sauce
or

a soy sauce and rice wine vinegar based option, this do-it-yourself dinner is a hands-on experience.

Thin slices of flank steak, chicken breast and beef short ribs were marinated in a sweet and salty sauce of soy sauce, sesame oil, brown sugar and rice wine for about an hour before grilling time. I picked up the thinly sliced short ribs and chile paste from an Asian market that is chalk full of foods I don't recognize. I typically use a combination of sign language, English words spoken with my best Chinese accent, and lots of pointing to find the items on my shopping list. I also tried my first bubble tea on my Asian market trip. The cold drink is a unique blend of tea, milk, and sugar with gelatinous tapioca pearls. A little on the odd side, but it is always exciting to try new things.


Having not retrofitted our kitchen island with a built-in grill, we have opted for a electric indoor barbecue grill purchased online from Amazon. I highly recommend this grill for (1) large grilling area, (2) quick heat up time, (3) nonstick surface for easy cleaning, and (4) metal tray under grate that is filled with water which makes clean up of any drippings even easier. A grill pan will also work, but will not be as much fun.

Armed with bamboo tongs and chop sticks, we enjoyed grilling our own meal. The slightly larger than bite-sized chicken pieces were a favorite as they were extremely tender. The interactive dining experience was so much fun, we had the Korean barbecue 2 out of the last 3 nights for dinner.

I see many more Korean barbecue meals in our future.


Korean Barbecue

serves about 5

1 1/2 pounds flank steak, sliced very thin against the grain
2 boneless chicken breasts, sliced very thin
8 beef short ribs, have the butcher slice them thinly or plank them

for the marinade -
3/4 cup soy sauce
3 tablespoons sesame oil
1/4 cup rice wine
2 garlic clove, minced
1/2 cup brown sugar

for the soy dipping sauce -
1 cup soy sauce
2 tablespoons rice wine vinegar
2 teaspoons brown sugar
1 tablespoon ginger root, grated
1 green onion, sliced thinly

for the garlic chili dipping sauce -
1/2 cup chile paste, also called hot pepper or chile pepper paste in Asian markets
1/4 cup water
1/4 cup canola oil
1 garlic clove, chopped

In a small bowl, combine the marinade ingredients. Place the steak, chicken and ribs each in a separate resealable bag and divide marinade equally. Seal and let meats marinate for about 1 hour. Because the meat is thinly sliced, it does not require a long marinating time.

Meanwhile, prepare the dipping sauces. For the soy dipping sauce, combine the ingredients in a small bowl; set aside. For the garlic chili dipping sauce, combine the ingredients in a small saucepan. Bring to a boil then reduce heat and simmer for 10 minutes. Let cool.

Heat grill to high (about 400 degrees). Remove the meats from the bags and place in separate bowls. Now it is time to barbecue. Grill meats until browned, but be careful not to overcook. Remove from grill and serve with dipping sauces.

Print recipe


Tuscan Steak with Escarole and Beans


The winter months limit the use of one of my favorite cooking methods - grilling. I have been using my grill pan quite a lot lately, and I also roast steaks and fish at a high temperature in the oven. But neither method yields the same char and smokey flavor of my Weber grill. Oh how I long for the warm summer months when we eat dinner on the deck and grill coffee rubbed steaks, barbecued chicken, teriyaki salmon, and balsamic glazed vegetables.

After picking up a steak at the market this afternoon, I decided outdoor grilling in 21 degree weather was not an option. I instead roasted my Italian-seasoned flank steak in the oven. Tuscan Steak with Escarole and Beans was tonight's dinner and well received by all family members. I am assuming that it was well received because everyone ate some part of the meal and did not return to the kitchen to eat again for about two hours.

An ingredient in the marinade was tomato paste. This is the brand that I have been favoring lately. The tomato paste comes in a tube like toothpaste. I like this packaging better than those little 6 ounce cans of tomato paste readily available at the market. With my tube of tomato paste, I can use just a tablespoon, screw the top back on and store the remainder in the refrigerator until it is needed again. Look for it in the canned tomato aisle at your local grocery store.

I can't wait until the summer when I can repeat this recipe and use my grill instead of my oven.

Tuscan Steak with Escarole and Beans

serves 4 - 5

1 1/2 pounds of flank steak
1/3 cup olive oil
1/4 cup sherry vinegar
1 tablespoon tomato paste
2 garlic cloves, chopped
1 teaspoon ground sage
2 teaspoons dried oregano
1 teaspoon salt
1/2 teaspoon pepper

olive oil
1 head escarole, washed, drained and chopped in bite-sized pieces
1 cup kidney beans
1 cup pinto beans
salt
pepper
chopped parsley for garnish

In a small mixing bowl, combine olive oil, sherry vinegar, tomato paste, garlic, sage, oregano, salt and pepper. Place steak in a resealable bag and add marinade. Let marinate for about an hour or up to 24 hours.

Preheat oven to 450 degrees. Remove steak from marinade and place on a baking sheet. Roast in oven for about 8 - 9 minutes. Turn steak over and continue cooking for an additional 4 - 5 minutes. The internal temperature of the steak should be between 120 and 125 degrees. Remove steak from oven and cover with foil. Let steak rest for 10 - 15 minutes.

Meanwhile, heat a large saute pan to medium high and add about 1 tablespoon of olive oil. Add the escarole and saute for about 4 - 5 minutes. Add the beans and heat through. Season with salt and pepper.

To serve, thinly slice steak against the grain. Place escarole and beans on a platter and top with steak. Pour any accumulated pan juices over the top and sprinkle with parsley.

Mashed Turnips with Parmesan

The turnips
There is a fantastic little market about a 10 minute drive from my town. It sells loads of different kinds of produce, has a fish market with a sushi chef, a deli with fresh prepared dishes, and lots of funky packaged products. I like to spend time just walking the aisles, usually I walk them more than once. The prices for the products are typically less than the local chain grocery store, and it is much more enjoyable to shop at this small market.

On a recent trip, I picked up the purple-hued turnips in the photo above. I wasn't sure how I was going to prepare my new produce purchase, but decided to buy them anyway. The turnips sat in my refrigerator for about a week and a half before my Turkey and Wild Mushroom Mini Meatloaf dinner a couple nights ago. My family loves Mashed Cauliflower, therefore I thought made my turnips would be good candidates for a mashed version of themselves.

Ooooooh! They did not disappoint. We liked them even better than the Mashed Cauliflower. Upon mashing, the turnips do not become completely smooth; the resulting dish is more on the chunky side. The addition of the Parmesan cheese is a pleasant contrast to the slightly sweet turnip flavor.

Break the mashed potato habit. Turnips are loaded with vitamin C, and Mashed Turnips with Parmesan are a welcome side dish to your winter dinner table.

Mashed Turnips with Parmesan

Mashed Turnips with Parmesan

serves 5

about 4 turnips, peeled and cut in large dice
1/3 cup shredded Parmesan cheese, with extra for sprinkling to top
3 tablespoons mayonnaise
salt to taste

Place the turnips in a large pot and and enough cold water to cover. Bring to a boil and reduce heat to a gentle boil. Cook turnips for about 20 - 30 minutes or until fork tender.

Drain well and return to pot. Mash turnips until they a slightly chunky. If necessary, turn the heat on medium and cook off any liquid that has accumulated. Add the Parmesan cheese and mayonnaise and stir to combine. Season to taste with salt and sprinkle with extra Parmesan cheese if desired.

Dinner # 7 of the 12 Dinners of Christmas -- Blue Cheese and Mushroom Pappardella


Sometimes my refrigerator gets no love. This week it has been pretty empty. I grocery shopped for 3 of my clients on 3 different days, but I somehow forgot to shop for my family while I was there.

Dinner #7 of the 12 Dinners of Christmas was conceived with what I found in my refrigerator and pantry. Some pappardella pasta, blue cheese, white mushrooms, half and half, and a bunch of parsley were the most attractive items I found. Blue Cheese and Mushroom Pappardella was a hearty vegetarian dinner that cooks up quick and can be prepared as the pasta cooks. This dish would also make a nice accompaniment to beef tenderloin and a glass of champagne on New Year's Eve.

The Kids had pappardella with fresh marinara which left more Blue Cheese and Mushroom Pappardella for me. They thought I was serving them something new because of the different pasta shape. Oh the little things that make them happy.

Blue Cheese and Mushroom Pappardella

serves 3 - 4 as an entree or 5 - 6 as a side dish

olive oil
10 ounces of mushrooms, sliced
salt
pepper
1/2 - 3/4 cup half and half
1/4 cup blue cheese, crumbled - plus more to sprinkle
2 tablespoons fresh parsley, chopped
8 ounces pappardella, cooked and drained

Heat a large saute pan to medium high and add a good drizzle of olive oil and the sliced mushrooms. Saute for 8 - 10 minutes or until the mushrooms start to lightly brown and caramelize. Season with salt and pepper. Stir in half and half and let reduce for a minute or two. Add more cream if you like your sauce a little saucy. Add blue cheese and stir to combine. Stir in parsley.

Serve over hot pappardella with extra blue cheese on top.

Print recipe

Shopping list


Tortilla Stacks

Tortilla Stacks
After an evening of trick-or-treating, Tortilla Stacks are a hearty snack to refuel you and your gremlins. I made this Mexican-inspired appetizer/entree/side dish a couple nights ago as go-to item to have on hand for My Oldest. She is famished when she gets home after field hockey, and she loves Mexican food. Her favorite is bean and cheese burritos so this is my take on them for her.

I saw a similar recipe in my Everyday Food: Great Food Fast cookbook and have been meaning to make it for some time. This recipe can be changed to different vegetables (like diced peppers) or spiced up with Tabasco or chipolte powder if you like hot foods.

My Oldest immediately ate half of the Tortilla Stack and reported that, "It tastes just like a bean and cheese burrito. It's really good." My Middle One promptly stated, "You smell like beans." I'll take that as she isn't going to be requesting this dish any time soon.

Tortilla Stacks would make a unique appetizer if cut in thin wedges. It could be a side dish with grilled chicken, steak or fish. Or serve it as a vegetarian entree with a salad.

Tortilla Stacks

Makes 2 stacks

olive oil
1 cup onion, diced
2 (15-ounce) cans black beans, drained and rinsed
2/3 cup chunky salsa
2 cups corn
2 - 2 1/2 cups cheddar cheese, shredded
6 flour tortillas, 6-inch
tomatoes, chopped
sour cream
cilantro

Preheat oven to 400 degrees.

Heat a large saute pan to medium high and coat bottom with olive oil. Add onions and saute for 5 - 6 minutes. Add black beans, salsa, and corn. Stir to combine.

Spray an 8-inch cake pan with cooking spray. Place 1 tortilla in the bottom of the pan. Top with some of the bean mixture and a handful of the cheese. Continue with two more layers of tortillas, beans, and cheese ending with a layer of cheese. Set aside. Make a second stack in another 8-inch cake pan. Each stack should have 3 layers.

Bake for about 10 - 15 minutes or until the cheese is melted and begins to brown. Let cool for about 5 minutes before slicing into wedges. Top with chopped tomatoes, sour cream, and cilantro.

Cinnamon Rubbed Pork Chops with Roasted Apples

Cinnamon Rubbed Pork Chops with Roasted Apples
"Pork chops and applesauce." Those of us in the 40+ age bracket have definitely seen the episode of The Brady Bunch when Peter utters that famous line. I decided to try my hand at this recipe and came up with Cinnamon Rubbed Pork Chops with Roasted Apples.

My kids love sauteed apples, and I make them frequently. Not one to repeat many recipes, I tried roasting the apples in the oven instead. A benefit of this method is that once the apples are ready to go into the oven, they basically cook themselves. The center cut pork chops were rubbed with cinnamon and seared in a hot pan. They finished cooking in the oven with the apples. The chops were topped with a glaze of maple syrup, shallots, apple cider vinegar, and a grind of pepper.

This recipe was a hit with the Family. It was also a hit with the Chefmom because of the ease of preparation. I served it with steamed broccoli spears and boiled new potatoes tossed with butter, salt, and pepper.

A tasty meal for a cool fall evening.

Cinnamon Rubbed Pork Chops with Roasted Apples

serves 5

for pork chops -
5 center cut pork chops
salt
pepper
1 teaspoon cinnamon

for apples -
6 medium sized apples, peeled and thickly sliced
1/4 cup dried cranberries
1/4 cup brown sugar
1 teaspoon cinnamon
2 tablespoons butter, melted

for glaze -
2 shallots, finely chopped
2 tablespoons apple cider vinegar
1/4 cup pure maple syrup
pepper

Preheat oven to 425 degrees.

Season the pork chops with the salt and pepper and rub with cinnamon. Set aside.

On a large baking sheet, toss apples and cranberries with the brown sugar and cinnamon. Drizzle with butter. Roast in oven for 13 - 15 minutes. Remove from oven and tent with foil until ready to serve.

Meanwhile, heat an ovenproof saute pan to high and coat with olive oil. Add the seasoned chops and sear until browned; about 3 - 4 minutes per side. Place the seared chops into the oven and roast for about 14 - 16 minutes for 1 1/2 inch thick chops or until the internal temperature is 135 degrees. The chops can be roasted in the oven at the same time the apples are cooking. Remove from oven and tent with foil until ready to serve.

To prepare the glaze, heat a small saute pan to medium high and coat with olive oil. Add the shallots and saute for 5 - 6 minutes. Add the apple cider vinegar and scrap any browned bits off the bottom of the pan. Cook for 1 - 2 minutes. Add the maple syrup and a dash of pepper. Bring to a boil and cook for 2 - 4 minutes until slightly thickened. Turn temperature to low to keep glaze warm.

To serve, place one chop on a plate and drizzle with some of the glaze. Top with the roasted apples.

Olive Oil Croutons and Creamy Caesar Dressing

Olive oil croutons
Homemade croutons and salad dressings pack a flavor wallop and and are healthier than the store bought alternatives. I have been making croutons for some time. They are the "crouton of choice" of my kids, and they even like to eat them for a crunchy snack. I recently started making my own dressings which are more flavorful, less salty, and fresher tasting than the dressings available at the grocery store.

Two favorite recipes for our salads are Olive Oil Croutons and Creamy Caesar Dressing. Both can be made in minutes with ingredients you usually have on hand. The lemony and Parmesan laced dressing is mixed in a mason jar which allows me to shake up the ingredients and store the dressing in the same container. I make a big batch of croutons hoping that I'll have enough for a couple days.

Freshen up your salads with your own dressing and croutons. You'll never reach from the store bought brands again.

Olive Oil Croutons

1 loaf of French or Italian bread cut in 1-inch cubes
olive oil
salt
pepper

Preheat oven to 400 degrees.

In a large bowl, place the bread cubes and generously drizzle with olive oil. All the cubes should be covered evenly, but not saturated. Sprinkle with salt and pepper. Spread cubes in a single layer on a large baking sheet. Bake for about 15 - 20 minutes or until the cubes are lightly browned. Watch carefully to insure the cubes do not burn.

Remove the croutons from the oven and allow to cool. Store in an air tight container for up to 3 days.


All the players
Creamy Caesar Dressing

4 tablespoons of mayonnaise
3 tablespoons olive oil
1 teaspoon Dijon or spicy brown mustard
1 teaspoon Worcestershire sauce
juice of half a lemon
1 garlic clove, minced
pinch of salt
pinch of pepper

In a mason jar, add all the ingredients. Screw on lid and shake to combine. If the dressing seems too thick, add a little more olive oil and shake again. Dressing can be stored in refrigerator for about 1 week.